Blog

CE Tech Tips — November 2022

**NOTICE**
Due to the danger and complexity of electronic equipment repair, the following technical tip is intended for professional reference only. Please refer to manufacturer’s recommendations as Encompass does not guarantee the accuracy, reliability or safety of this information.

Samsung TV, HP-T5054
Reason for service: Panel doesn’t prime, but audio okay.
Solution: Replaced two FET’s on Y-board: Q5303 and Q5304. 

Samsung, LNT3232HX/XAA
Reason for Service: Backlights not working, but sound Ok.
Solution: Replaced 4 bad caps in power supply, CM851, CM852, CM856, CM858 and bad fuse F3 on inverter board.

Samsung TV, UN40JU6400
Reason for service: No video or audio and no backlight.
Solution: Found shorted cap off pin 8 of IC304. Just removed cap.

Samsung, UN46H6201AF
Reason for Service: Set has no video, but audio and backlight are okay.
Solution: Replaced  T-Con board.

Sony TV, RA6
Reason for service
: Dead set, 6 blink error.
Solution: Found D5004 on G board shorted.

Toshiba TV, 32TL515U
Reason for Service: No audio.
Solution: Reflowing BGA on main restored audio. IC100

Vizio, E550VL
Reason for Service: Has amber logo, but won’t turn on.
Solution: Replacing IC U14 fixed set.

Vizio TV, E422VA
Reason for service: No video or audio.
Solution: Reflowing BGA on main fixed set. U401

Want more tips? Click here to see all electronics and appliance tips!


Evolution of Parts Distribution

It’s said the only constant in life is change – a sentiment that is certainly a given in the business world.  Companies form, merge with others or disappear for lack of innovation against startups or competitors. Industry disruptors have been a prevalent part of commerce for thousands of years since cattle trading gave way to coins as currency.

Just when it seems impossible, something new comes out of nowhere to upend the status quo. From online retailers usurping brick and mortar retailers to mobile phones replacing landlines, answering machines and cameras, it’s not a matter of if a better mousetrap will come along, it’s when.

While a disruptor may be inescapable, it’s not all that dire. In fact, a study conducted by Strategy& (PwC’s global strategy consulting team) found that the “fear of disruption can be more damaging than actual disruption.” Additionally, existing businesses typically have plenty of time to respond to new trends before they are impacted, according to the study. Examples cited were Amazon and Google, which each took at least 10 years before dominating the web and ecommerce.

When facing a threat, established businesses that try to rush out ill-conceived strategies are just about as ineffective as those that do nothing, the study found. Instead, incumbents are more likely to succeed when they focus on continually accentuating their own core strengths and forming tighter customer connections to build loyalty.

Distribution is no less vulnerable to disruption than any other industry. As a middleman, distributors are always at risk for disintermediation. In turn, they must continue evolving and innovating to provide increasingly value-added services. The question that should be asked repeatedly is “how can we help our customers be more successful?” This is the difference between a partner and merely an order-taking vendor and a disrupter and an incumbent.

In parts distribution, it’s all about keeping critical components in stock and getting them to the customer the same or next day. This requires a massive effort beginning with forecasting what customers will need and ending with the right parts quickly in the hands of the customer. In between, every step of the process must be optimized for efficiency, accuracy and maximum throughput.

With decades of parts experience, Encompass is heavily investing in the latest AI and predictive technology to arm customers with vital data. Helping customers troubleshoot repairs and identify the right parts for the job are just a couple of ways we’re serving as more than just a supplier. Working directly with customers, we also develop creative tools that address specific pain points and help them be more successful.  Along with product repair training, video content and matching tech skills with those needing to strengthen service networks, Encompass is deploying a host of resources for the benefit of the entire industry.

We’re also targeting warehouse management solutions and automated functionality with the goal of expediting parts delivery. Backed by the resources and best practices of our parent company Parts Town – the global market leader in foodservice equipment parts distribution – we’re better positioned than ever to turn our customer-centric visions into reality.

While technology is at the heart of many of our innovations, we still believe in good old-fashioned people skills. If you want to interact with a real person, Encompass has the channel for that. Our teams are always out visiting customers in person all over the country or we’re calling them with information on important new services or just to find out if we can do anything to assist.

In 2023, Encompass will celebrate its 70th anniversary. We could not have survived in a competitive industry this long without continually raising the bar for customers. While we mark this important milestone in our history, we will forever be looking forward and exploring how we can offer more.

To the market disrupters out there, we say: our resolve to be best-in-class is only getting stronger.

CE Tech Tips — October 2022

**NOTICE**
Due to the danger and complexity of electronic equipment repair, the following technical tip is intended for professional reference only. Please refer to manufacturer’s recommendations as Encompass does not guarantee the accuracy, reliability or safety of this information.

Hisense TV, LTDN46V86US
Reason for Service: Set won’t start, intermittently.
Solution: Found 3 bad caps on the power board, C811, C812 and C814.

LG TV, 42LG50
Reason for Service: Picture was solarized.
Solution: Found and replaced bad U21 on the T-Con Bd. AS15F.

LG TV, 60PV400UB
Reason for Service: Power comes on, but set doesn’t prime.
Solution: Repaired Z-Sus module by replacing a leaky C418 chip cap and three 10ohm resistors R430, R439 and R517.

LG TV, 60PV400
Reason for Service: Set powers on, but no prime.
Solution: Replaced following on Z-Sus module: R439, R517 R430, all 10ohm chip and C418.

RCA LED52B45RQ
Reason for Service: Dead, but red LED blinks once when power button pressed.
Solution: Found bad cap on power supply board, C14, 47uF.

Samsung TV, PN60E530A3FXZA
Reason for Service: Doesn’t prime, no video or picture.
Solution: Replaced ceramic caps with 10uF/63V electrolytics. C5160, C5162 and C5046. 

Sanyo TV, FW65D25T
Reason for Service: No video, audio is okay.
Solution: Replacing FRC board fixed set. 

Vizio TV, XVT3D474SV
Reason for Service: Set will not start. Amber logo, but doesn’t change to white.
Solution: Reflowing the BGA on main board fixed the set. U9

Want more tips? Click here to see all electronics and appliance tips!


Bosch Oven Troubleshooting and Repair Tips

**NOTICE**
Due the danger and complexity of electronic equipment repair, the following technical tip is intended for professional reference only. Please refer to manufacturer’s recommendations as Encompass does not guarantee the accuracy, reliability or safety of this information. 


This article provides step-by-step instructions for fixing some of the most common Bosch oven problems. From replacing a burned-out light bulb to cleaning a dirty door seal, these tips can help keep an oven in top condition:

1. Oven won’t turn on

One potential reason that an oven is not turning on is interruption to the power supply. Check to see if the circuit breaker has tripped or a fuse blown. If so, reset the breaker or replace the fuse and try turning on the oven again.
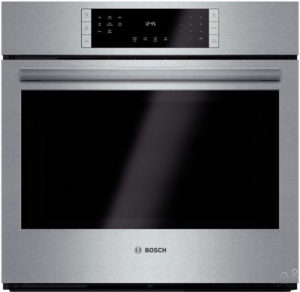
Another common cause for an oven not turning on is a faulty igniter. If the igniter — which lights the gas in the oven — is not working correctly, the oven will not heat up. To test the igniter, see if it is glowing. If it’s not glowing brightly or not lighting the gas within 90 seconds, it needs to be replaced. You can also test the igniter for continuity with a multimeter.

Finally, a damaged bake element can also prevent an oven from turning on. The bake element, which generates heat, is located at the bottom of the oven. If it’s cracked or broken, it will need to be replaced to fix the problem.

2. Oven light out

There are a few different causes for an oven light to go out. First, check the light bulb to see if it needs to be replaced. If the bulb is intact and screwed in tightly, the problem may be with the socket or wiring. When sockets and wiring are involved, it’s best for safety to to call a professional electrician to assist.

Otherwise, it may be a blown fuse. Check the fuse box to see if a fuse has blown, and replace it if necessary.

3. Oven time not setting

One of the most common problems with ovens is a clock or timer not working. One reason for this could be that the power cord is not plugged in all the way. Additionally, the power outlet may not be working, or there’s something else wrong with the oven.

First, ensure the power cord is plugged in securely. If it is, check the power outlet by plugging in another appliance. If the outlet works, then there may be a separate problem with the oven, requiring a professional service provider.

4. Oven not heating

Another common problem is an oven not heating. This can be caused by a variety of issues, including a faulty heating element, blown fuse or issue with the temperature. In most cases, the problem can be resolved relatively easily.

Check to see if the heating element is still in place and functioning properly. Next, check the fuse box and replace any blown fuses. Finally, adjust the temperature to see if that resolves the issue.

If the oven still isn’t heating up, it’s possible there’s a more serious problem with the wiring. In this case, it’s best to call in a qualified technician for further assistance.

5. Oven not baking evenly

There are several reasons why an oven might not bake evenly. One common cause is a build-up of dirt and grease on the heating elements. This gunk can insulate the elements and prevent them from adequately conducting heat.

Another possibility is that the oven door is not sealing properly. If there is even a small gap, heat can escape, resulting in uneven baking. The final and most serious cause is a problem with the oven’s thermostat. This can cause the temperature to fluctuate, making it impossible to achieve consistent results.

Fortunately, there are a few simple steps that can be taken to fix these problems. First, make sure to clean the oven regularly, paying special attention to the heating elements. If the door is not closing properly, check the gasket for damage and replace if necessary. Then, if the thermostat appears to be malfunctioning, contact a qualified technician for repairs.

6. Broiler not working

One obvious reason is the broiler element is not heating up. If so, replace it. Another possibility is a problem with the igniter, which sparks gas in the oven. If it’s not working, the gas won’t ignite and the broiler won’t turn on. It will need to be replaced if found to be faulty.

Finally, the gas valve could be defective. If the gas valve is not open, gas will not flow to the oven and the broiler will not turn on. If you think this might be the problem, it’s best to contact a qualified technician to replace the valve.


Special thanks to Fred’s Appliance Academy for this helpful tip!

Best Ways to Clean Dryer Vents

**NOTICE**
Due the danger and complexity of electronic equipment repair, the following technical tip is intended for professional reference only. Please refer to manufacturer’s recommendations as Encompass does not guarantee the accuracy, reliability or safety of this information. 

Vents are generally installed from a dryer to an external port on the side of the home. They’re an important part of any laundry setup, but are often ignored until they become clogged and cause issues such as:

  • Excessive lint on clothing
  • Minimal to no drying
  • Laundry is excessively hot
  • Humidity might rise during dry seasons

Cleaning a clogged vent is relatively easy; here are five steps to getting your unit in tip top shape:

1. Disconnect Dryer to Access Vent

First, ensure the dryer is disconnected from its power source. Look for any clips or screws that might hold down the housing from the unit and unclip/unscrew them to detach the vent from. Always make sure the power has been disconnected before attempting any appliance repair to avoid getting shocked.

2. Clean Exhaust 

Excessive lint most often builds within the exhaust that connects the dryer housing. Take a quick look at the filters and the overall unit for any dirt/sand or lint. Use a  wire brush to reach in with a twisting motion and then gently pull it out to capture lint and other possible debris.

3. Brush and Vacuum Duct and Pipe

This step requires the most effort due to its location going from the dryer unit inside the wall through to the outside. Place a bucket or small trash can underneath the end of the duct to catch debris. Then, use a stretchable or twisty brush and scrub the inside of the duct. Use a brush handle extension to reach into the pipe as far as possible. The pipe leads the duct all the way to the exterior for expelling air and lint, so it needs cleaning.

After scrubbing the duct and pipe interior walls, lint should come loose. Use a vacuum rod extension or flexible hose and run it down the length of the duct to suck up the debris.

4. Check Exterior Vent

All vents lead to an outer exhaust opening. To help ensure the brushing has not propelled the lint to the far end, check the exterior opening as well. Open the grate of the vent if it is grilled. Use a flexible brush to scrub as far as you can reach, and then use a vacuum to remove loosened lint. This will ensure that airflow is unobstructed and directed toward wet clothes instead.

5. Reconnect Everything 

To return the dryer to working condition, connect the duct and pipe to the exhaust section of the dryer unit, taking care to replace the outer grill. Next, reconnect the exhaust to the dryer and test it to check for proper airflow. If everything flows nicely without spitting out too much debris, it’s a home run.


Special thanks to Fred’s Appliance Academy for this helpful tip.

CE Tech Tips — September 2022

**NOTICE**
Due to the danger and complexity of electronic equipment repair, the following technical tip is intended for professional reference only. Please refer to manufacturer’s recommendations as Encompass does not guarantee the accuracy, reliability or safety of this information.

Insignia TV, NS-LCD47HD-09
Reason for Service:
No video, B/Ls okay.
Solution: Replacing U507 on main board fixed the set (was running very hot).

LG TV, 42LG50
Reason for Service: Picture solarized.
Solution: Found and replaced bad U21 on T-Con Bd. AS15F.

LG TV, 50PJ350-UB
Reason for Service:
Set starts for a second then shuts off.
Solution: Check/replace R927 & R929, both 22Ω/5W.

Protron TV, PLTV-32CM
Reason for Service
: Audio volume low and distorted.
Solution: Replacing two bad caps on main fixed set. CE6 and CE7, 100uF/16V.

RCA TV, RLDED5078A-D
Reason for Service: No video or OSD.
Solution: Replaced open fuse on T-Con, 3A.

Samsung LN-T2342H
Reason for Service: Dead set.
Solution: Found bad zener in power supply, DZB803.

Sylvania TV, 6432TFY
Reason for Service: Dead set, may chirp.
Solution: Found bad D653; replaced, 18V zener.

Vizio TV, E420VA
Reason for Service: Dead set.
Solution: Replaced small blue cap in power supply, C911, .01uF/1KV and F901, 5A fuse.

Vizio, VW42L
Reason for Service: Backlights strobing and making buzzing noise.
Solution: Replaced C421 in power supply and two 470mF/35V on master and slave inverter boards.


Want more tips? Click here to see all electronics and appliance tips!


Remove Excess Suds from Dishwasher

**NOTICE**
Due the danger and complexity of electronic equipment repair, the following technical tip is intended for professional reference only. Please refer to manufacturer’s recommendations as Encompass does not guarantee the accuracy, reliability or safety of this information. 

Ever experience suds in a dishwasher blowing bubbles out the bottom and flooding the kitchen? Here’s what to do if it ever happens again:

Excess suds are typically caused by introducing soap that is not intended for dishwashers. The most common soap that should not go in a dishwasher is standard liquid soap used for handwashing dishes. This type of soap is meant to create lots of suds, while dishwashing detergent is not.

So how do you get rid of the suds flowing out of the dishwasher and save your kitchen floor? It’s as easy as introducing a little bit of vegetable oil. Stop or pause the dishwasher’s current cycle and pour about one-quarter cup to one-half cup into the bottom of the unit. Close the door and let it continue to run again for just a few more minutes. Then, open the door again and select the “cancel drain” cycle. After the unit has drained completely, open the door again and rerun the normal wash cycle.

Allow the unit to run for about five minutes or so. And then again, open the door, select the cancel drain button and let the unit drain out. Afterward, open the door and inspect the bottom for suds. If suds still exist, go ahead and start a normal wash cycle. And just repeat that process until the suds are gone. If there are no more suds, then it’s back to normal.

Special thanks to Fred’s Appliance Academy for this helpful tip.

CE Tech Tips — August 2022

**NOTICE**
Due to the danger and complexity of electronic equipment repair, the following technical tip is intended for professional reference only. Please refer to manufacturer’s recommendations as Encompass does not guarantee the accuracy, reliability or safety of this information.

Panasonic Combo, PVDM2791
Reason for Service: No vertical.
Solution: Replaced following: U451, LA7331, C401, 2.2uF/50V, C402, 470uF/16V, C408, 1uF/50V, and C409, 100uF/35V. 

Samsung TV, PN64D7000FF
Reason for Service: Dead set, no standby power light
Solution: Found bad solder on TS801S and TS802S in the power supply and resoldered.

Samsung TV, LN52A650A1F
Reason for Service: Set cycling.
Solution: Replaced C132 on main board with 47uF/16V electrolytic.

Vizio TV, E420VA
Reason for Service: Dead set.
Solution: Replaced small blue cap in power supply, C911, .01uF/1KV and F901, 5A fuse.

Vizio TV, D58U-D3
Reason for Service: Screen has bluish color.
Solution: Replaced all LED strips, which restored normal picture.

Vizio TV, SV422XVT
Reason for Service: Set won’t start.
Solution: When you plug in set, logo is amber and never turns white. Reflowing both BGAs under heatsinks on main board fixed problem.

Vizio TV, E370VLE
Reason for Service: Set won’t start. Logo changes from amber to white, but no B/L, no sound.
Solution: Found D120 on power board was shorted. Used MUR460.

Vizio TV, VO47L FHDTV10A
Reason for Service: No backlights, audio okay.
Solution: Replaced following: C241, 470uF/35V in power supply, C2 & C3 both 680uF/35V on master inverter board plus 10A fuse F1, and C102 & C103, both 680uF/35V on slave inverter board.

Want more tips? Click here to see all electronics and appliance tips!


LG Extends Parts Supply Territory for Encompass and Dayton Appliance Parts

Move enables merging distributors to supply LG parts from five new U.S. locations

 Lawrenceville, Ga., August 3, 2022 – Encompass Supply Chain Solutions, a division of Parts Town and leading provider of replacement parts and supply chain services for a diverse range of product brands, today announced LG has authorized Dayton Appliance Parts (DAP) to distribute LG repair parts from DAP’s locations in three states.

DAP – which is integrating with Encompass starting Aug. 6, 2022 – will now be able to ship warranty and non-warranty LG appliance parts from distribution centers in Dayton, Ohio; Columbus, Ohio; Evansville, Ind.; Indianapolis; and Huntington, W. Va.

Encompass is currently working to migrate DAP into its parts inventory, ordering and accounting systems. As each DAP distribution center and counter is transitioned, customers will be directed to Encompass’ ecommerce site encompass.com to place orders going forward. Once integration is completed this fall, nationwide customers of both suppliers will have seamless, one-source access to parts in 10 states, along with pick up service at multiple counters.

Robert Coolidge, Encompass president and CEO and Parts Town divisional president, said Encompass has been focused on expanding its existing manufacturer authorizations to include DAP locations.

“Encompass is a long-time partner of LG, so we are pleased to be able to expand our reach into additional regions,” said Coolidge. “With the addition of DAP’s distribution facilities, we continue to execute on our strategy to expedite parts delivery coast to coast. The new service area enables us to provide next day ground shipping to an even greater number of business and consumer customers.”

Last month, DAP received authorization to supply parts for Midea, another top appliance and HVAC manufacturer. Encompass currently manages repair parts for Midea per a supply chain management agreement formed in 2019.

About Encompass Supply Chain Solutions

In 2022, Encompass was acquired by Parts Town – the global market leader in foodservice equipment parts distribution – to expand its residential parts division, along with Dayton Appliance Parts.

Formed in 1953, Encompass is one of the country’s largest suppliers of repair parts and accessories for products throughout the home. Encompass also offers complete parts supply chain management, 3PL, depot repair and reverse logistics service. In addition to consumers, we support an array of B2B customers, including manufacturers, multi-family property management, warranty providers, service networks, independent dealers and retailers.

For more information, please visit solutions.encompass.com and follow us on LinkedIn, Facebook and Twitter.

Properly Test Thermistor

**NOTICE**
Due the danger and complexity of electronic equipment repair, the following technical tip is intended for professional reference only. Please refer to manufacturer’s recommendations as Encompass does not guarantee the accuracy, reliability or safety of this information. 

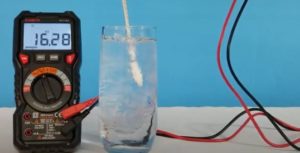
One of the most accurate ways to test a refrigerator’s thermistors is to use a glass of ice water.  Here is a helpful video showing the process.

With a thermistor hooked up to a multimeter, submerge into a glass of ice water. In the video, the multimeter read about 11,000 ohms prior to inserting the thermistor into the water. This is a correct reading as the current temperature of the room in the demonstration is 73°F.

When testing a thermistor, it’s important to consult a chart that states what the resistance value of the thermistor should be at any given temperature. This particular thermistor should have a resistance value of about 32,000 ohms at 32°F, which makes a glass of ice water a perfect testing mechanism.

The video shows resistance value climbing towards 32,000 ohms. As the resistance value reaches 32,000 ohms, its reading starts to slow as the thermistor reaches 32°F. It read correctly at 73°F as well as 32°F. Now, keep in mind, that these resistance values should be within plus or minus 10%. Out of range by more than 10%, plus or minus, it should be replaced.

Special thanks to Fred’s Appliance Academy for this helpful tip.