Author - Kristin Hurst

CE Tech Tips — June 2018

**NOTICE**

Due the danger and complexity of electronics repair, the following shared technical tips are intended for professional reference only. Please refer to manufacturer’s recommendations as Encompass does not guarantee the accuracy, reliability or safety of this information.

Hitachi TV, 57UWX20B
Reason for Service: Has HV, but no sound or video.
Solution: Found Q445 leaky and replaced.

LG Plasma, 42PJ550-UD
Reason for Service: Set comes on, then turns right back off.
Solution: Look for bad solder on the ZSUS board.  Check L1 and tighten all screws.

RCA TV,  ATC010
Reason for Service: Shutdown, might be intermittent.
Solution: Found an open R835, 120k ohm.

Samsung LCD, LN52A750R1FXZA
Reason for Service:  Dead set
Solution:  Replacing main fuse and Q1815 and 16 fixed the set.   P11NK50ZFP

Samsung HLS5679W
Reason for Service:  No sound
Solution: Replaced several caps.  CM854, CS857, CM860,  2200uF/25V and  C858, C859,  47uF/50V

Sony TV, KDL22L5000
Reason for Service: No remote operation.  The remote itself tests okay.
Solution: Found two shorted caps off pin 3 of the receiver.  C9113 & C9114

Toshiba TV, 27D46
Reason for Service: Intermittent Vert Sweep
Solution:  Replacing D402 fixed the set.

Vizio TV, VO32LFHDTV10A
Reason for Service: Set has no picture but sound okay.
Solution: We found no 12V at the T-Con.  U37 regulator on main bd was bad.  Chip marked 4953GM.

Zenith TV, PV4663MK, Mod 9-1302
Reason for Service:  No picture or raster, sound okay.
Solution:  Had to replace the following:  CRX3412, (NTE577), Horiz Out, QX3200, (2SD2539) and the Fly.  95-4134-29.


Replacing Dishwasher Circulation Pump and Assembly

**NOTICE**
Due the danger and complexity of electronic equipment repair, the following technical tip is intended for professional reference only. Please refer to manufacturer’s recommendations as Encompass does not guarantee the
accuracy, reliability or safety of this information. 

One of the most common service calls involving malfunctioning dishwashers is inability to completely clean dishes. There are many reasons why a dishwasher might stop doing a thorough job. A malfunctioning circulation pump and motor assembly might be the culprit, and it’s one of the hardest parts to reach in the appliance.

What Does the Circulation Pump and Motor Assembly Do?
This piece of hardware controls the flow of water that exits in the dishwasher’s spray arms. It is controlled by the electric system and washer settings, but it’s also a mechanical part that moves and forces water out of the spray arms at different pressure settings. That means there are multiple different triggers that could force the pump and motor assembly to break.

One of the clearest signs of a broken assembly is dirty dishes. If water isn’t hitting the dishes with enough force to rinse away food or soap, then the pump may not be doing its job. However, anything from a poor dish arrangement to clogged holes in the spray arm can cause the same problem. Be sure to investigate other common causes or ask your customer for more details before replacing the part. Once you decide the assembly is at fault, order the replacement part (#1106293 for older Bosch models and 00442548 for Thermador dishwashers.)

Step-by-Step Instructions to Replace Circulation Pump and Motor Assembly:

  1. Unplug dishwasher and turn off water.
    Every appliance repair should start with removal of the power source unless the appliance must be powered on during the job. Replacing a broken circulation pump and motor assembly involves disassembling both wire harnesses and water hoses, so both inputs need to be removed to keep you and the surrounding area safe.
  2. Remove the base and outer door panels.
    For this job you will need to access the dishwasher door’s interior parts. Locate the base panel under the dishwasher door. Loosen the two screws holding the panel in place, and set it aside. To remove the outer door panel, open the door and remove the six screws along the interior perimeter to release the panel. Next, shut the door and pull the bottom of the outer door panel away from the machine. You can then slide the panel down and remove it from the remaining door assembly. Set it aside. Additionally, loosen and remove the inner access panel between the base panel and the outer door panel for complete access to the machine parts.
  3. Pull out the dishwasher.
    Before you move the dishwasher, disconnect the water line and drain hose under the sink. There is probably water in the drain lines so lay down a towel and have a container ready to catch any spills. Then, loosen the two screws and mounting brackets holding the dishwasher in place against the counter top. Grab the sides of the machine and gently wiggle or slide it free.
  4. Disconnect the interior parts around the base of the machine.
    Remove the side covers on the left and right sides of the machine. Then remove the hinge link covers, which are the white plastic panels near the front. Once you set them aside, you will be able to see the door cable hooks that were underneath the covers. Remove them and loosen the screws holding the base of the dishwasher to the cabinet.
  5. Open the machine.
    Remove the lower dish rack and the spray arms. Unscrew the filter bask and fine filter and set them aside. Also, unscrew and remove the spray arm support and the two sump supports before shutting the door. Lay the dishwasher on its back without pinching any loose hoses.
  6. Remove the dishwasher’s base to access the assembly.
    This step involves a lot of disassembly and parts. If each step feels overwhelming or confusing, stop and snap a picture of the details. This will help you reassemble the machine and reverse your steps.Disconnect the sump hose from the water inlet and sump, then twist it out of the way without fully removing it. Gently wiggle the base of the dishwasher so it pulls slightly away from the rest of the machine. This is the section with all of the hoses and parts that you loosened in step five. While you shouldn’t completely remove it, you will need space to remove and install the circulation pump and motor assembly part.

    Remove the drain pump by pressing the latch and twisting it free. Set it aside without removing the attached wire harness. Then, remove the circulation pump the same way. Remove the drain outlet hose. This should let you pull the circulation pump assembly out of the base. Move it carefully and set it on top of the dishwasher without pulling at the attached wire harnesses.

    Clean the sump’s gasket while the machine is open. This step isn’t necessary for the repair, but dishwashers can develop a lot of buildup. It’s unlikely the dishwasher will be disassembled to this extent again, so now is the perfect time for some quick cleaning and maintenance.

    Remove the clamp holding the circulation pump to the heater assembly. If possible, set the clamp aside for later use. However, some clamps are not reusable, so bring a spare clamp with you to the repair site.

    Disconnect all of the wire assemblies. At this point in the disassembly, take a picture. It’s hard to remember where each wire harness should connect to the assembly, and having a picture on hand means you don’t have to worry about incorrect wiring.

    Pull the assembly free of the heating and sump. It should come apart with enough pressure. Then, pry the pump seal away from the top of the part for later use. Also, remove the rubber straps to isolate the circulation pump and motor assembly. The ordered item contains the assembly part only, so you’ll need to save the seals, straps, and, if possible, clamp for reuse on the replacement part. 

  7. Replace Assembly.
    Put the sump seal back in position. Then put the clamp, or a new clamp, on the sleeve for later. Attach the assembly to the heater and sump by the pump ports. If the arms won’t fit, use an approved lubricant or soapy water to reduce the friction. Put the rubber mounting straps back in position and tighten the clamp around the arm. Next, reconnect the wire harnesses in the exact previous configuration.
  8. Insert New Assembly.
    Secure the part inside the base of the dishwasher using the rubber straps. Then, reconnect the sump outlet hose and snap the drain pump back in position. Once it’s aligned, twist in clockwise for a tight seal. Once everything is positioned correctly, push the base of the machine back against the dishwasher. Make sure you aren’t pinching any parts. Then twist the water inlet hose back around and reattach it to its ports.
  9. Reassemble Dishwasher.
    Set the whole machine upright once more. Resecure the base of the dishwasher by inserting and re-tightening the screws in the front and back of the base. Then open the dishwasher door and replace the spray arm parts and filters you removed earlier. Snap the spray arm into position and put the dishrack in the machine. Next, snap the door locks and hinge covers, and side covers back in place on each side of the machine. 
  10. Move Dishwasher Back in Place.
    Carefully push the machine back under the counter and re-secure the mounting screws to lock it in place against the countertop. Then reattach the hoses under the sink. Finish your reassembly by:
    -Screwing in the inner access panel
    -Sliding the outer door panel into place and then tightening the interior perimeter screws
    -Securing base panel

Once you turn on the water connection and power, the dishwasher should now be able to clean each load of dishes without leaving behind residue. Ensure that the machine turns on and the cycle starts properly before completing the job. This repair involves a lot of disassembly, so it’s important to make sure everything is in working order, and that the hoses don’t leak.

Special thanks to Fred’s Appliance Academy for this helpful tip.

CE Tech Tips — May 2018

**NOTICE**

Due the danger and complexity of electronics repair, the following shared technical tips are intended for professional reference only. Please refer to manufacturer’s recommendations as Encompass does not guarantee the accuracy, reliability or safety of this information.

Hitachi TV, 50V500A
Reason for Service:  All front LED indicators continuously flashing in sequence
Solution: Replace lamp

LG TV, 50PG20 UA.AUSVLJR
Reason for Service:  Set intermittently turned off and then sometimes back on
Solution: Found several bad solder joints on U101 regulator on power supply board

RCA TV, 40LA45RQ
Reason for Service: No backlights
Solution:  Replaced Inverter, INV40N14B 

Samsung TV, LN37A550
Reason for Service:  Picture washed out
Solution: If set uses AS15-F or AS15-G chip, replace it.

Sanyo TV, DP42848-00
Reason for Service:  Power light goes off and on
Solution: Replacing the HDMI chip fixed the set.  IC6504, SI19185ACTU

Sony TV, KDL37XBR6
Reason for Service:  No video
Solution:  Replaced open fuse on main, F1422, 5A, and replaced AS15F chip on T-Con.

Toshiba TV, 52HM84
Reason for Service: Bad ballast board
Solution: Replaced open R3, 390k and D2, D3. FMVG2GS

Vizio TV, VO37LHDTV10A
Reason for Service:  Tuner problem, auto program showed all channels but only few HD
Solution: Found bad cap in tuner, 10uF/10V; replacing fixed problem.

CE Tech Tips — April 2018

**NOTICE**

Due the danger and complexity of electronics repair, the following shared technical tips are intended for professional reference only. Please refer to manufacturer’s recommendations as Encompass does not guarantee the accuracy, reliability or safety of this information.

LG TV, 37LG50
Reason for Service:  On Screen Display flashed “This function is not available now.”
Solution: Leaky switch found on the keyboard.  SW108 

Magnavox TV, 37MF321D
Reason for Service:  Dead
Solution: Replaced the following to fix set:  1H00 crystal, 8238.277.36071 & Caps 2H08, 2H09,  2238.869.75478

Mitsubishi TV, VS6051
Reason for Service:  Picture too bright
Solution:  Found bad R9A45, 180 ohm / half W.

Panasonic Plasma,  TC-P50U50
Reason for Service:  Shutdown, 8 blink code
Solution:  Found Q051 shorted on SS board; replacing fixed the set. 

Samsung TV, IN46A500T1FXZA
Reason for Service: Picture too bright, washed out
Solution: Replacing U7 on T-Con fixed set.  AS19-H16.  Note: There is solder under  IC as well as pins. 

Sony TV, KDL40V4100
Reason for Service: Picture too bright
Solution: Replace T-Con or AS15-F IC on T-Con.

RCA TV,  PTK195
Reason for Service:  No video, has HV and filament
Solution: Replace CR14501 near Vert IC. Could also be Vert IC; turn up G2 to see if Vert is collapsed.

Toshiba Combo,  MW27H62
Reason for Service:  Intermittent shutdown, red light goes out
Solution:  Replacing Digital board with #72783951 fixed set.

Vizio TV,  E320VL
Reason for Service:  Set comes on, logo goes from amber to white, then shuts down
Solution: Replacing U18 EEPROM fixed set.


65 Years of Encompass: 1953-2018

Encompass Supply Chain Solutions, Inc.
From Tire Store to Market Leader in Forward and Reverse Logistics in 65 Years

What began as a small family-operated tire and appliance venture in Miami has evolved over six decades to become one of the largest, most diversified repair parts and supply chain service companies in the U.S.

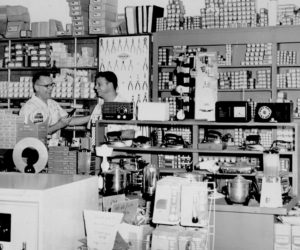
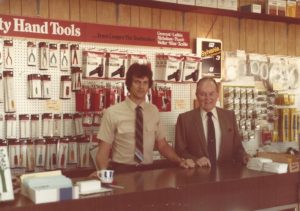
Vance Baldwin Electronics (c. 1953). Founder Vance Baldwin at left with General Manager Hank Politz

Encompass was originally formed in 1953 as Vance Baldwin Electronics in Ft. Lauderdale, Fla. Baldwin, the company’s namesake and founder, is the maternal grandfather of Encompass’ current president and CEO, Robert Coolidge. In the mid-2000s, Vance Baldwin, along with Tritronics (parts distributor based in the Northeast) and Cyber-Test (Central Florida repair service business) were acquired and merged together to form Encompass.

The Early Days
In the 1940s, Baldwin sold tires and appliances for BF Goodrich, as well as refrigerators and furniture for Kmart in South Florida. He then opened his own business, Economy Auto Tire, which offered both tires and small appliances. In those days, no businesses
were dedicated to just appliances, thus the odd combination of goods.

Baldwin leased space in his store to Ned Goddard who repaired radios. Seeking to capitalize on an opportunity in radio and television tubes, the pair opened Goddard Supply in 1950 in West Palm Beach, Fla. as a side business. With its success, they opened another in Ft. Lauderdale the following year.

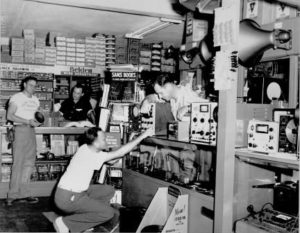
          Vance Baldwin Electronics (c. 1955)

Baldwin split with Goddard in 1953 and renamed the Ft. Lauderdale business Vance Baldwin Electronics. The store carried TV tubes, public address speakers, phonograph needles, TV wire, cable and antennas. Baldwin handled purchasing and finance and hired a salesman to call on area TV repair shops. Deliveries were made the next day in company vans.

In 1960, Baldwin converted the Economy Auto Tire store to a third branch of Vance Baldwin Electronics. At the height of the business, Baldwin had a store in Fort Lauderdale, Miami, West Palm Beach and Tampa.

Surviving Industry Changes and Competition
In the 1960s and 1970s, competition from big box stores started creeping in, but the electronics industry was still just emerging. In 1973, Baldwin’s son Fred joined the business as a salesman for the Miami branch after graduating from Florida State University. The store was struggling at the time to compete against other local businesses. TV tubes represented the majority of store sales. They were generic and could fit multiple manufacturer brands. As a result, the only way to really differentiate in the market was through price.

Fred Baldwin soon landed the coveted Channel Master line of popular antennas, another product with high demand before cable took off

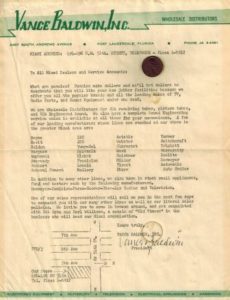
Vance Baldwin Electronics’ first line card

– particularly after frequent Florida rain storms.  As transistors started coming out to revolutionize electronics, the supplier became one of the first RCA original parts distributors.

With television tubes, just about anyone could repair a TV, but with sets now becoming more sophisticated and circuit board-based, servicers had to ramp up their technical skills. This shift also changed the dynamics of the parts distribution business since boards, unlike tubes, were unique to each manufacturer. Vance Baldwin had locked in exclusive distribution agreements with numerous electronics manufacturers, so many other distributors were forced to switch to other market segments, such as industrial parts.

With the competition Vance Baldwin did face, the main way to stand apart was having parts on the shelf, readily available, versus price. The company also offered same or next day delivery, will call / counter sales and a showroom that featured test equipment, solder, tools and other items.  They marketed the business through monthly flyers and a product catalog mass distributed to TV repair shops.

In 1980, Vance Baldwin’s Miami location was set on fire during the infamous Liberty City riots. Looters had spied boxes of parts and mistook them for valuable electronics. The street in front of the store was littered with discarded boxes and scattered parts. The company was forced to relocate to another area of Miami and in 1983, opened a facility in Tampa, adding to existing facilities in Ft. Lauderdale and West Palm Beach. Fred was named company president at this time.

No-Tech Warehousing and Fulfillment

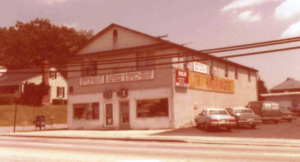
Tampa VBE facility — delivery van at left (c. 1984)

In Tampa, Scott Cameron was hired as the first deliveryman for the business, working his way up to branch manager. Today, he is senior vice president of Operations and Service Solutions for Encompass. Tom LoCrasto, who joined the Tampa branch as a salesman about the same time as Scott in 1983, is also still a member of the Encompass team, serving as an account manager for key clients.

Tom traveled the state calling on small “mom and pop” electronics repair stores sharing printed catalogs that listed Vance Baldwin’s brands and high-demand parts. In the early 1980s, cable TV had not yet penetrated rural areas, so antennas remained a hot item, especially during notorious Florida thunderstorms when high winds could send them flying off roofs.

Fred Baldwin (left) with Vance Baldwin at Tampa facility (c. 1984)

Tom would then stop by phone booths to call in orders to the Tampa warehouse, which he would then often pick up and deliver himself on his next visit to the customer. Everything was done manually – from handwriting pick tickets and invoices to counting physical inventory.

Vance Baldwin stayed active in the business, working primarily in accounting, before retiring in the mid-1980s. In 1990, Fred recruited his nephew, Robert Coolidge, to lead IT efforts for the company.  A computer at that time was only used for financial functions. Everything else, including inventory procedures, was done manually on paper. Printed catalogs and line cards were a must-have for marketing purposes.

To check to see if a part was available, employees had to physically count inventory cards. Orders were similarly taken down on paper, and if a part was on back order, an employee had to call and inform a customer. Because manufacturers resisted fulfilling orders daily like they do now, most parts came in on stock orders, and it took much longer to fill back orders. If Vance Baldwin didn’t have a part, they would typically just lose the sale.

Entering the Digital Age

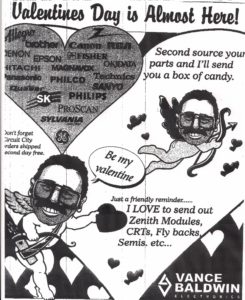
Tampa store’s Valentine’s Day promotion featuring salesman Tom LoCrasto as cupid (1999)

To increase efficiency, Fred and Robert evaluated various software systems and eventually purchased a system and source code.  Robert was trained in writing code, so they could manage the system on their own without having to rely on outside vendors. Leveraging this added capability, Robert sold the concept and value of system integration to various retailers such as Circuit City and Rent-A-Center.

As one of the first major innovations for the company, Vance Baldwin could now accept orders electronically and report to clients what had shipped that day – something that gave the company an edge over competitors. Robert touted tech services to land larger and larger clients with national scope, as well as new manufacturer brands sold by these clients.

The system was based on software used in the automotive industry to manage core parts. The concept of putting a “return deposit” or core on high demand, expensive parts like circuit boards initiated in the auto space and later into electronics with Vance Baldwin at the forefront. Robert used his tech savvy to reconfigure and customize the software to better fit the business and client needs.

By the late 1990s and early 2000s, the company started phasing out printed catalogs to focus solely on e-commerce. While sales were made through the web, manufacturer referrals were more of a sales driver. Vance Baldwin also started offering web hosting for businesses such as remote control suppliers. During this time, Robert

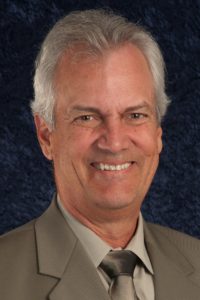
Former Vance Baldwin Electronics President Fred Baldwin (2012)

and Scott were instrumental in automating the warehouse and improving the pick/pack/ship process to be more streamlined and productive.

Seeking a more centralized location to serve its nationwide customer base, Fred decided to close the Tampa facility in 2001 and open a larger distribution center in Lawrenceville, GA. The facility was strategically situated just north of Atlanta, a transportation super hub.

By the mid-2000s, TV failure rates – and prices – began dropping rapidly, and LCD televisions were starting to replace DLP. DLP lamps were one of the company’s top-selling parts because they needed to be regularly replaced, so this had a serious impact on sales. Plus, manufacturers that had primarily relied on distributors to supply parts, increasingly began selling direct to capture additional revenue.

It was in this market climate in 2007 when Fred decided the time was right to exit the business. He sold the company to Encompass Group Affiliates, the principal operating unit of Advanced Communications Technology, Inc., a New York-based company, which publicly-traded the new business “over-the-counter.”

Encompass had already acquired Cyber-Test, a Florida-based electronics repair business. After the Vance Baldwin acquisition, Encompass acquired Tritronics, another industry-leading parts supplier with distribution centers in Maryland and South Florida. Most of the leadership from the merged companies remained intact to manage day-to-day operations and business development efforts.

Loyalty is Foundation of Tritronics Formation
Roger Williams’ foresight and sense of loyalty led to the founding of Tritronics in 1975. While working as a sales rep for an electronics

First Tritronics building outside Baltimore

distributor in Baltimore, Md., he was told to fire the manager who initially hired him. The business was floundering, and Roger was the top salesperson, so the owner had planned to increase his pay after the manager was let go. Instead, predicting (correctly) that the company was going under – and not willing to terminate his own manager – Roger convinced his manager and another co-worker to instead leave with him and form their own company. His wife Ginny thought up the name “Tritronics,” to symbolize the trio engaging in the electronics industry. Roger and his partners were ready for business.

For their first storefront, the triumvirate rented the ground floor of a former grocery store  and meat market in Perry Hall just outside Baltimore. The space was about 2,200 square feet; within six months they took over the entire

Tritronics Founders/Owners Roger & Ginny Williams during visit to Abingdon, MD facility (1985)

5,000-square-foot building. They were a Channel Master distributor and sold a variety of television parts, operating out of the space – which they ultimately purchased – until 1981.

Adapting to Industry Trends
By 1982, the company principals predicted that receiving tubes were soon going to be obsolete. Like Vance Baldwin, they were keenly

aware that the industry was changing with more and more manufacturers requiring original parts for repairs. Tritronics obtained their first major line of direct replacement parts to support GE followed by RCA. The company next went after Sharp, which was then looking for 20 distributors across the U.S. to provide parts support. Sharp, along with other manufacturers, required Tritronics to have a QUIP machine – a precursor to the fax machine – for order transmission, which they had obtained.

Two Sharp representatives met with Roger as part of their search. When told of the volume he could expect as a national distributor for Sharp, his “mouth was hanging on the floor.” The reps left and told him they’d be in touch soon with their decision. Not willing to wait, Roger drove the next day from Baltimore to the Sharp facility in New Jersey and caught the men as they were coming into work. He asked them “Where do

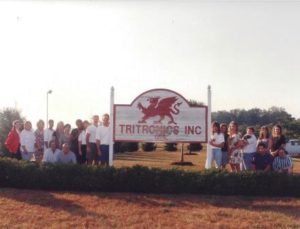
Tritronics team at Abingdon, MD facility. Photo shot for parts catalog.

I sign? We’re ready to start now.” Flabbergasted, they told Roger they had not yet made a decision since they only just met with him the previous day. Unfazed, Roger insisted “There’s no time like the present,” and the reps finally conceded. Much later in the relationship, the leader of Sharp parts and service told Roger, “I don’t know what you’re doing down there, but keep it up.”

All of this marked a huge turning point for the company, which was still operating out of old meat market with two upstairs apartments. To accommodate their growth, they moved the business to Columbia, MD located between Washington, D.C. and Baltimore, which was easier to ship to with a direct path to manufacturer proprietary parts. The new facility was    5,000 square feet with one level. At that point, the business was joined by two of the Williams’ children, Kim Wagner and Randy Williams, and a son-in-law, Jim Scarff. [Kim served the company until 2012 as head of Operations. Randy remains with the company today as vice president of Purchasing and Jim as vice president of Customer Support.]

Every step of the pick/pack/ship process was done manually at the time. Servicers would call in to order a part, and an employee would look up the model’s exploded view in a service manual, search the parts list for the part number and then find the price in another manual or via microfiche. This process took 5-10 minutes; now this information is just a click away on the Internet.

Automating the Business
By 1985, Roger was ready to invest in a computer system to automate many of the business’ manual tasks. The remaining partner then

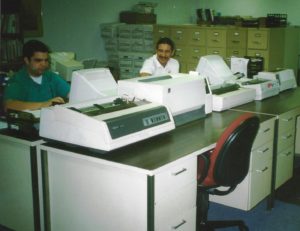
Tritronics in age of CRTs and dot matrix                                                 printers

decided the time was right to leave the company. With no prior business experience, Ginny stepped up to become Tritronics’ “computer whiz,” maintaining two systems to separately manage inventory and accounts receivable.

In 1988, the couple developed their own 20,000-square-foot building in Abingdon, MD. The timing couldn’t have been better because Sharp was cutting its 20-distributor network to just three. With an impressive new distribution center, Tritronics was fortunate to become one of those three. Soon after, Roger seized on another Sharp opportunity by opening a second facility in Miami to serve the Southeastern U.S. This new distribution center was also convenient for customers who were flying into South Florida from the Caribbean islands just to buy repair parts.

Over the years, Tritronics carved a niche as a distributor focused on serving the smaller  repair shops, while competitors like Vance Baldwin were seeking to partner with large retailers. Fast forward to 2007: Tritronics’ Abingdon facility had grown to more than 42,000 square feet, served around 5,000 active customers and employed 85 staff members. The television market was changing drastically, and Tritronics was starting to feel the effects. New unit prices were dropping so low that it was becoming more economical to replace a set than repair one, so once profitable parts were no longer in heavy demand.

Time to Exit
Just like Fred Baldwin, Roger decided the time was right to accept a purchase offer extended by Encompass Group Affiliates, Inc. (EGA),

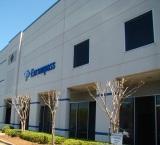
Encompass headquarters in Lawrenceville, GA

a New York-based publicly-held company. In 2004, EGA acquired Cyber-Test, an electronics equipment repair company. By completing the acquisition of both Vance Baldwin and Tritronics in 2007, EGA became one of the only distributors in the country offering both repair service and parts under one roof. Cyber-Test was rebranded to Encompass Service Solutions, and Vance Baldwin and Tritronics were united under the name Encompass Parts Distribution.

During the economic decline of the late 2000s and early 2010s, the company reorganized. In 2011, the company went private as Encompass Supply Chain Solutions, Inc., and Robert Coolidge was named President and CEO. A salesman at heart, Robert has proven to be a hands-on executive who aggressively seeks new business opportunities wherever they may lie. He is never content with the status quo and persistently challenges his team to think creatively and push the boundaries. This drive has helped steer Encompass through some of the most challenging times of its six-decade history, and has helped positioned the company for continued success and profitability.

Robert Coolidge
Encompass President & CEO

Robert has been able to accurately predict market trends, which led the company to start diversifying parts support years ago to prevent too much reliance on consumer electronics. The CE industry is now faced with changing technology combined with falling prices, making obsolescence a constant battle. In years past, when TVs were much more expensive, consumers usually had them repaired. Now they want the latest models, and it’s no longer as cost-prohibitive to simply throw out non-working sets.

Celebrating 65 Years
Encompass has grown tremendously and now supports more than 200 manufacturer brands in dozens of product categories beyond consumer electronics – from personal care to home maintenance. More manufacturers are opting to outsource their entire parts supply chain to control infrastructure and labor costs, while improving customer satisfaction. Managing the parts supply chain has become a key offering from Encompass, which counts among its clients global manufacturers such as Sony, Panasonic and Philips.

Encompass

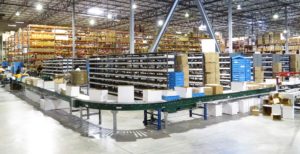
Encompass adds automated conveyor to increase productivity (2014)

As it reaches its 65th anniversary, Encompass’ core business still centers on parts distribution, but it   has significantly expanded to offer a full range of both forward and reverse logistics services. Now shipping parts worldwide, Encompass continues to operate facilities in South Florida and Atlanta and recently expanded to Las Vegas. The company also targets new customer segments like consumers and whole home warranty providers. With so many diverse product verticals supported, Encompass is an ideal partner for warranty companies covering a range of different goods.

Vance Baldwin may not recognize the company he first founded, but he would be proud that the foundation he laid remains solid – there have just been a few renovations and extra stories added on with more exciting enhancements on the horizon for years to come.
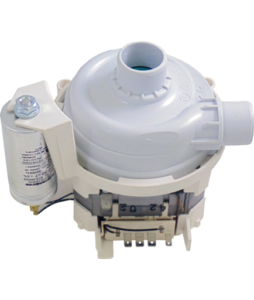
Whirlpool Dishwasher Pump Replacement

**NOTICE**
Due the danger and complexity of electronic equipment repair, the following technical tip is intended for professional reference only. Please refer to manufacturer’s recommendations as Encompass does not guarantee the accuracy, reliability or safety of this information. 

When a dishwasher won’t clean dishes, one of the first likely causes is the pump outlet. This part connects the main water supply tube to the pump and spray arms. If it cracks, water pressure decreases and will not properly shoot out of the spray arms to effectively wash food 
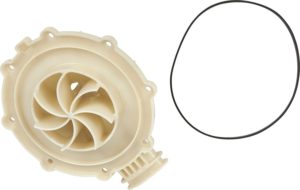
particles away. Here’s how to fix a Whirlpool dishwasher in just a few minutes with replacement part 8194582.

1. Unplug appliance. Even though this repair doesn’t involve electrical components, unplugging or flipping the circuit
breaker to major appliances (especially major appliances with water) better ensures your safety.
2. Access spray arms. Open the dishwasher door and remove lower rack. Unscrew spray arm central piece and fully remove, along with arms and bearings. One metal bearing is in the spray arm apparatus, and the other is below resting on the pump outlet.
3. Remove pump outlet. There are eight screws holding the pump outlet in place below the spray arm apparatus. Use a
screwdriver to remove the screws. Set them aside for later use since the replacement parts do not come with replacement screws. Disconnect from supply tube. Remove the old pump seal with flathead screwdriver.
4. Install replacement part. Put seal in housing and connect pump outlet to water supply tube. Make sure outlet is aligned with holes and screw into position.
5. Put the dishwasher back together. Reinstall bearings and spray arm apparatus. Make sure it spins with friction or tension.

Special thanks to Fred’s Appliance Academy for this helpful tip.

CE Tech Tips — March 2018

**NOTICE**

Due the danger and complexity of electronics repair, the following shared technical tips are intended for professional reference only. Please refer to manufacturer’s recommendations as Encompass does not guarantee the accuracy, reliability or safety of this information.

AIWA Stereo, AV-D57U
Reason for Service: Display very dim (unviewable)
Solution: Found bad C123 in the power supply; fixed the unit.  220uF/25V

Emerson TV,  LC220EM1
Reason for Service:  Picture cycles through Red, Green and Blue Screens.
Solution: Using the remote, push R cursor, L cursor, Up then Down.

Insignia TV,  NS-32E320A13A
Reason for Service:  Dead, no standby
Solution:  Found an open resistor in power supply that fixed the set. R9317, 1.5M 

Philips TV,  37MF321D/37
Reason for Service:  Shutdown with power light blinking
Solution:  Replacing D6079 on power board fixed the set.  9.1V, half W zener

Sony TV,  KD-36XS955
Reason for Service:  Instant shutdown with 3 blink code
Solution:  Shorted mylar cap, C598, on the AY board, off pin 10 of audio amp IC.   0. 1uF/50V,  #113049511

Toshiba TV,  55G310U
Reason for Service:  Dead set
Solution:  Found Q101 and 102 bad in power supply.  FQPF13N50C.  Main fuse also bad.

Vizio TV, VO32LFHDTV10A
Reason for Service:  Sound okay, but no picture
Solution: No 12V to the T-Con.  Found U37 regulator IC Bad.  Chip marked 4953GM

Zenith TV, PV4663MK
Reason for Service:  No HV, but audio okay
Solution: Replaced the Fly, Vert Out LA7838 and burnt 3.3 ohm resistor near the fly.


Encompass Appointed Exclusive Distributor in the Americas of VAIN STHLM Hi-Fi Sound Products


Lawrenceville, Ga., February 15, 2018 – Encompass Supply Chain Solutions, Inc., a leading provider of Supply Chain Logistics, Parts Distribution, 3PL and 4PL solutions for a diverse range of finished goods and replacement parts, today announced it will market and distribute VAIN STHLM headphones and earbuds throughout North and Latin America.

Under an agreement with startup Swedish manufacturer VAIN STHLM, Encompass will initially distribute VAIN’s Original brand ear buds and Commute wireless headphones in the U.S. with plans to eventually expand to Latin America and Canada. Encompass will mainly leverage its flagship distribution center located just north of Atlanta to manage inventory and fulfill orders.

Award-winning industrial designer Lisa Minogue created the look and feel of the products, which feature the classic minimalism of Scandinavian design and are inspired by the aesthetics of the renowned Stockholm subway. The VAIN lines fall within the mid-range and luxury price points.

Encompass has developed a customized e-commerce portal for the online purchase of VAIN products: VAIN.encompass.com.

“We are thrilled to be partnering with VAIN STHLM to introduce their exciting high-end sound products to the U.S.,” said Encompass Director of International Business Development Jose A. Hernandez. “Encompass has extensive expertise assisting electronics manufacturers with turnkey distribution solutions that fast-track leading-edge products to market, and we look forward to working with VAIN to help ensure a highly-successful product launch.”

With a deep passion for design and music, Michael Klingvall launched VAIN STHLM with his brother Mathias in Stockholm, Sweden, from which the company derives its name. Their wide selection of in-ear, lightweight headphones has been available overseas since 2015. Adding on-ear headphones was the next step in optimizing the product line, said Klingvall.

“Our vision was to create innovative, sleek listening devices that could deliver top-quality sound to music-loving, style-conscious people,” said Klingvall. “The ultra-modern design of the Commute and Original lines, combined with their functionality and portability, has so far been extremely enticing to customers.”

Klingvall said the VAIN products have already started to receive positive reviews from the international press for their “style and powerfully rich sound at a reasonable price.”

“While we believe VAIN earphones and earbuds are a clear standout in the global audio market, it is gratifying to receive such great feedback from other experts in the field,” said Klingvall. “With such great independent reviews, our orders are ramping up, particularly in the U.S. It was imperative for us to find a proven distribution partner like Encompass who could quickly step in with the necessary infrastructure and resources to ensure fast delivery to our customers.” 

About VAIN STHLM

VAIN STHLM is a Swedish brand founded in 2012 by two brothers who are passionate about music and making great sound accessible. VAIN STHLM products feature high-quality sound and function finished with a Swedish-inspired minimalistic design.

CE Tech Tips — February 2018

**NOTICE**

Due the danger and complexity of electronics repair, the following shared technical tips are intended for professional reference only. Please refer to manufacturer’s recommendations as Encompass does not guarantee the accuracy, reliability or safety of this information.

Audiovox TV,  FPE3206
Reason for Service: No audio
Solution: Found SM cap C210 bad, and had leaked on board.  Clean board thoroughly in the surrounding area. 

Hitachi TV,  50V500A
Reason for Service:  No video with sync bars, or aspect not working.
Solution:  These symptoms are caused by problems with the PSC3 (50 pin) connector, on either end, or with the ribbon cable #EK01182. 

Magnavox TV, 26MF330B/F7
Reason for Service:  Dead
Solution: Found shorted cap, C645 in power supply.  3300uF/6.3V 

Mitsubishi TV, VS-583R
Reason for Service:  Convergence not working
Solution: Replaced the following to fix set:  STK392-110’s, R520 & R522,  0.82ohm/2W,  & D520 & 522

 Sharp TV,  LC-60E69U
Reason for Service:  Dead
Solution: Found 3 open resistors in power supply.  One meg each.  Replacing, fixed the set.

Sony TV,  KLV26HG2
Reason for Service:  Won’t power up, no lights on front panel.
Solution: Replacing the B board fixed the set.

Toshiba TV,  MW26G71
Reason for Service:  Shutdown
Solution: Flyback, FB401 found to be defective.  Replaced with AE004955.

Vizio TV,  VX20LHDTV
Reason for Service:  Won’t start
Solution: When turning set on, logo was amber but never turned to white.  Replacing U8 fixed the set.  AMC1117 regulator.


Replacing GE Refrigerator Temperature Control

**NOTICE**
Due the danger and complexity of electronic equipment repair, the following technical tip is intended for professional reference only. Please refer to manufacturer’s recommendations as Encompass does not guarantee the accuracy, reliability or safety of this information. 

Not cooling is a common complaint with refrigeration, and unfortunately, the cause of the issue can vary greatly. Once you’ve isolated the cause to the temperature control, order replacement part (# WR09X20002 for most GE/Hotpoint models) and follow these steps:

1. Unplug the refrigerator.

2. Pull out the temperature control box. Open the fresh food door and find the temperature control panel. Unscrew the light bulb, then loosen the screws so you can lower the box cover. Next, unplug the wire harness connecting the box cover to the remainder of the temperature control and take the box cover out of the refrigerator. The part you will be replacing is in this box.

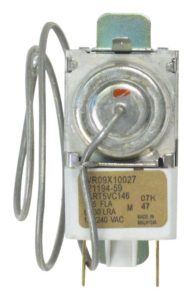
3. Isolate the temperature control. First, remove the knob from the shaft in the back right corner with a screwdriver. Then, pry the tabs connecting the grounding and adjacent wires free.

4. Remove the control. Pull back the tabs on each side of the temperature control. Do it one side at a time so you can tilt the corners of the control to pull it free. As you’re lifting the control, also pull free the capillary tube that is attached to the control.

5. Switch the plastic around the capillary tubing. The new part comes with a capillary tube but needs the outer plastic tube. Reshape the capillary tubing to mirror the older part. Then pull the plastic tube off the old capillary and slide it into place on the new part.

6. Replace the temperature control. First, align the tubing and push it into the groove, including around the timer. Then plug the control into the terminals. Once the control is in place, make sure the tubing is still in place.

7. Replace the surrounding parts. Reattach the wires exactly as you disconnected them. Then put the knob back into place by ensuring the wide and narrow ends fit.

8. Put the box back into place. Reattach the wire harness. Then make sure the actual cover box goes around the insulation and front shield. Then re-tighten the screws and screw the light bulb back in the socket.

Special thanks to Fred’s Appliance Academy for this helpful tip!