
Replacing GE Refrigerator Temperature Control
**NOTICE**
Due the danger and complexity of electronic equipment repair, the following technical tip is intended for professional reference only. Please refer to manufacturer’s recommendations as Encompass does not guarantee the accuracy, reliability or safety of this information.
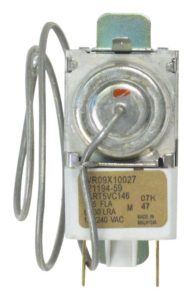
Not cooling is a common complaint with refrigeration, and unfortunately, the cause of the issue can vary greatly. Once you’ve isolated the cause to the temperature control, order replacement part (# WR09X20002 for most GE/Hotpoint models) and follow these steps:
1. Unplug the refrigerator.
2. Pull out the temperature control box. Open the fresh food door and find the temperature control panel. Unscrew the light bulb, then loosen the screws so you can lower the box cover. Next, unplug the wire harness connecting the box cover to the remainder of the temperature control and take the box cover out of the refrigerator. The part you will be replacing is in this box.
 3. Isolate the temperature control. First, remove the knob from the shaft in the back right corner with a screwdriver. Then, pry the tabs connecting the grounding and adjacent wires free.
4. Remove the control. Pull back the tabs on each side of the temperature control. Do it one side at a time so you can tilt the corners of the control to pull it free. As you’re lifting the control, also pull free the capillary tube that is attached to the control.
5. Switch the plastic around the capillary tubing. The new part comes with a capillary tube but needs the outer plastic tube. Reshape the capillary tubing to mirror the older part. Then pull the plastic tube off the old capillary and slide it into place on the new part.
6. Replace the temperature control. First, align the tubing and push it into the groove, including around the timer. Then plug the control into the terminals. Once the control is in place, make sure the tubing is still in place.
7. Replace the surrounding parts. Reattach the wires exactly as you disconnected them. Then put the knob back into place by ensuring the wide and narrow ends fit.
8. Put the box back into place. Reattach the wire harness. Then make sure the actual cover box goes around the insulation and front shield. Then re-tighten the screws and screw the light bulb back in the socket.
Special thanks to Fred’s Appliance Academy for this helpful tip!


Leave a Reply