
Electric Range Troubleshooting
When you’re in the middle of preparing a tasty meal, you’re likely not giving much thought to the inner workings of your electric stovetop…until something goes wrong that is. Following is some insight into how ranges work and what could be wrong when you need it the most.
Understanding How an Electric Range Works
The more you know how something works, the easier it is to diagnose problems. While this post centers on electric cooktop repair, it’s helpful to have a basic understanding how the range works:
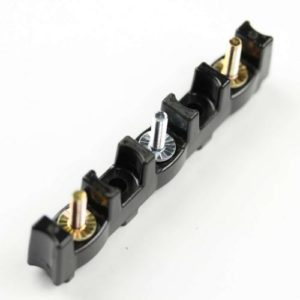
- Electricity from a power source is delivered to a terminal block inside the range through three large wires in the power cord.
- Electrical power is then distributed to components that operate various range features, such as thermostat, heating elements, and heating coils that comprise most of the cooktop.
- Heating elements are insulated coils with a metal covering that creates heat and electrical resistance to achieve the desired temperature.
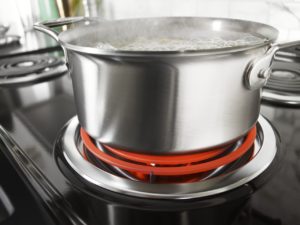
- Range cooktops come equipped with either a conventional or radiant burner. The radiant burner sits underneath a ceramic surface that was designed for better heat distribution.
- Each element is supported by its own switch that turns the burner on and sends a message to the thermostat to heat to the desired temperature. The oven is designed to effectively maximize heat and air control.
- Heat levels are controlled by switches and thermostats. Switches control the on and off, while the thermostat controls the temperature level.
- One type of switch for electric range tops is an infinite-heat switch, which pulsates power to heating elements on an as-needed basis, maintaining the correct level of heat.
 Troubleshooting
#1. Burner Won’t Heat Because of an Electrical Short
Grease and moisture can seep into the power source receptacle of plug-in burners. This can lead to arcing creating an intermittent electrical short that may hardly be noticed. However, the element will eventually burn out.
Solution
- Regularly clean burner element tips and inside of the receptacle to prevent a burner from shorting.
- When a heating element must be replaced, be sure to replace the power source receptacle too.
- Do not immerse the burner in water to clean. The plug-in tips on the burner element contain porcelain and will absorb water. The burner may appear dry, but even a small drop of water could cause serious electrical shock.
- To prevent cross-contamination, return the same heating element to the receptacle it came from.
- Use a drip pan to capture grease and oil, but do not line drip pans with foil. The light from the element reflects off the foil back to the element, causing hot spots that will render the heating element useless.
#2. Burned Out Element
Each burner element is controlled by its own switch. When the switch selector knob is turned to a particular heat setting, the switch enables voltage to travel to the element, closing the circuit and causing the element to heat. If the element does not heat, the component has burned out. How to manage this repair:
- Inspect a conventional element for any blistering or breaks in the coil. If there are visible breaks or bubbling, the circuit has been interrupted and the element needs to be replaced.
- When inspecting the coils that sit underneath a ceramic top, look for any breaks or burn spots. Replace the coil if any anomalies are visible.
- If there is no visible damage, check for continuity with a multi-meter.
Solution
Replace the burned-out heating element.
#3. Burned Out Receptacle
If the heating element test proves it is in good shape, assess the power receptacle:
- Burned out receptacles interrupt voltage sent to the heating element.
- Inspect contacts for visible burn marks or damage.
Solution
If there is visible damage, replace the power receptacle.
#4. Loose or Burnt Wire Connection
As you work your way through troubleshooting, be sure to look for any loose or burnt wires.
- It is common for element power supply wires to burn out near the element. If this is the case, you will see visible burn marks. If a wire is loose, try wiggling it back onto its connection.
Solution
Replace damaged or burnt wires, as well as the power receptacle and heating element.
#5. Defective Surface Element Switch
The heating element switch regulates the voltage that controls how much heat is displaced to the coils. When the element reaches the desired temperature, the switch shuts off the voltage. To maintain the designated temperature, this cycle continues throughout the cooking process.
- A defective switch may prevent the element from working at all.
- Try simply taking a similarly sized element and plug it in (see below for directions on how to replace a plug-in burner).
- If the new element fails to work, suspect the switch.
Solution
Replace the element switch.
How to Replace a Plug-in Burner
- Plug-in burners are commonly used in General Electric, RCA, Hotpoint, Whirlpool, Frigidaire, and Kenmore ranges.
- When doing this repair, be careful to avoid any sharp edges.
- Remember Safety First! Before beginning any work on the range, unplug it from the power source.
- Once the range is unplugged, grasp the damaged burner by the outer coil, lift it up and pull straight out.
- Replace the burner by sliding the prongs into the terminal receptacle.
- Pull the burner forward to lock it in place.
- Reconnect the range to the wall outlet and turn the new burner switch to on.
Special thanks to Fred’s Appliance Academy for this helpful tips!

 2. Remove the access panel on the terminal pull. Pull the oven away from the wall and move to the back of the appliance. Locate the