Author - Kristin Hurst

Is your business listed accurately online? Here’s why it’s so important.

In today’s virtual world, search engines have replaced the Yellow Pages as the #1 tool consumers use to find anything they need, from driveway paving to washer repair. Developing a dynamic business website is important, but ensuring your company is accurately listed on various other online channels is just as critical. These online directories or “citations” are any sites that post a company’s name, physical address, phone number and web address.

Some examples of citation sites are Google My Business, Yelp, Facebook, Foursquare, Merchant Circle, CitySearch and Bing Places, among others. Like the phone books of days past, businesses must ensure their listings are correct with updated information. Companies often set up their profiles and never look at them again. However, the Internet is a dynamic entity — it moves and changes like the wind.

A simple mistake can occur like it did recently with Fred’s Appliance Service.  A DSL (Internet connection) number ended up being listed by accident to multiple online directories. The DSL number would ring forever with no answer. An unintended error by the DSL provider caused major issues for Fred’s Service. Customers would call for hours with no luck assuming the company was closed, and they took their business elsewhere. Unlike today’s high-tech appliances, there is no error code for this type of blunder. The damage is hard to calculate since Fred’s had no idea how long the issue had been going on and how many people tried to call the wrong number.

Sometimes errors may be more intentional. Take this recent news story of a customer calling the number on a Google listing only to have someone pose as a company representative. It wasn’t until the customer found a different number listed on a different website that she discovered the issue. The company owner had not been checking his company listings, enabling others to siphon customers away while damaging his reputation in the process.

Ensuring your customers have the right information is important, but it’s also important to look through search engines like Google and Bing. Just because you have a Google My Business listing does not mean you will show up in Google search results when someone enters “appliance repair near me.” Search engines pull from all citation sites to narrow down the best results to search queries. So having your business listed on as many citation sites as possible will help increase your online exposure.

To check your business’ online profile, start by taking time to review listings at Google My Business, Bing Places, Facebook and Yelp. Make sure the correct data is provided, including your hours of operation (including holiday hours). It can be overwhelming and time consuming to maintain all your listings, so consider partnering with a marketing company like Fluid Services, which can help update listings and provide regular reports of the most common directories.  This will give you peace-of-mind knowing that your customers are going to consistently find the most accurate contact information for your company.

Special thanks to Fred’s Appliance Academy for this helpful tip!

CE Tech Tips — October 2017

**NOTICE**

Due the danger and complexity of electronics repair, the following shared technical tips are intended for professional reference only. Please refer to manufacturer’s recommendations as Encompass does not guarantee the accuracy, reliability or safety of this information.

Hitachi TV, 60SDX88B
Reason for Service: Shutdown
Solution:  Q777, Q657 & EP98

Magnavox TV,  37MF321D
Reason for Service:  Dead, light flashing
Solution:  Found two swollen caps in power supply, replacing them restored normal operation.  2081,  1500uF/35V & 2074,  2200uF/25V.

 Panasonic TV, PT50LC13
Reason for Service:  Need to reset lamp timer after changing the lamp.
Solution: Turn on TV, simultaneously press and hold volume down on front of set and the PIP/VTR on the remote.  Hold for 10 seconds, then OSD will say Lamp Time Reset to 0.

 Polaroid TV,  TLX03210B
Reason for Service:  Set tries to start, then red LED blinks continually.
Solution: Found two bad 10uF/450V in the power supply.  Replacing fixed the set.

 Sony TV,  NSX-46GT1
Reason for Service:  Set turns on with the Sony picture, then freezes.  Goes no further.
Solution:  Replaced M board and upgraded software.  Part # A-1787-298-A

Toshiba TV,  52HM84
Reason for Service:  Lamp won’t light
Solution:  Check ballast components:  1k resistors, two rectifiers and C6,  0.1uF/400V metal film poly cap. Ballast needs 350V and a 5V enable signal to work. 

Vizio LCD TV E550VL
Reason for Service:  Shuts off intermittently.
Solution: Replacing the main board fixed the set. 

Zenith TV, 9-1302 module
Reason for Service: No video and intermittent raster
Solution:  Look for bad solder on fly pins; also check for bad solder on top and bottom pins of daughter board.


Replacing Door Switch on GE Refrigerator

**NOTICE**
Due the danger and complexity of electronic equipment repair, the following technical tip is intended for professional reference only. Please refer to manufacturer’s recommendations as Encompass does not guarantee the accuracy, reliability or safety of this information. 

Note: this tip applies to GE Refrigerator Model GTE21GSHSS

If the light is out in your GE refrigerator model GTE21GSHSS and a new bulb didn’t fix the problem, you are most likely dealing with a malfunctioning door switch.Replacing a fridge door switch is an uncomplicated repair, and should only take a few minutes. Here’s an easy-to-follow guide:

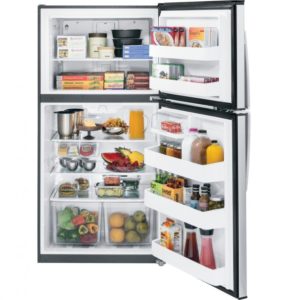
How to Replace Refrigerator Door Switch
Tools Needed:
â—Ź Putty knife
â—Ź Screwdriver
â—Ź New door switch wr23x20371

Safety First: Before starting any type of refrigerator repair , unplug the appliance. Wearing work gloves and safety goggles is also a must. Please read through the step-by-step guide provided before tackling this repair.

1. Open the refrigerator’s fresh food door and locate the door switch. Once you’ve found the switch, examine it to find out whether there is a screw holding it in place or not. If there is, use a screwdriver to remove it; if there isn’t, carefully pry the switch out of its housing with a putty knife. You may want to tape the edge of the knife to avoid damaging the inside of the appliance.

2. Gently pull the switch out to expose an inch or two of the wires. There will be either two wires, meaning the switch only controls your refrigerator’s light or four wires, which indicates the switch controls the light and the fan. Before you begin detaching the wires from the switch, label each one. This will make putting them back where they belong easier. To remove the wires, carefully pull them out by the connectors.

3. Connect the wires to the new door switch’s terminals. Once the wires are secure, either snap the switch back into its housing or reattach the screw you removed earlier.

4. Plug your refrigerator back in and test the door switch by opening and closing the fresh food door. If the light is still malfunctioning in your refrigerator or you have concerns about another appliance, please contact Fred’s Appliance today and we’ll be happy to help you.

Special thanks to Fred’s Appliance Academy for this helpful tip!


Encompass Team Shares Expertise at Warranty Conference

Encompass on Sept. 14 participated in a panel discussion entitled “Cost Management and the Supply Chain” at this week’s 8th Annual Extended Warranty & Service Contract Innovations event in Nashville. Encompass panelists included Stacy Golden, director of Operations and Compliance; Mark Frye, Customer Support senior manager; and John Sessions, TPA Development.

From left: Stacy Golden, Mark Frye, John Sessions

The discussion centered on how warranty companies and manufacturers may want to consider outsourcing parts supply to save on labor and infrastructure costs; minimize buyouts; expedite claims processing; and enhance customer service among many other benefits to consider.

Integrating systems with service dispatch, claims processor and field service networks was also explored as a complement to parts supply chain management outsourcing.

Special thanks to our valued business partner Centricity — a top service and protection plan provider — for sharing this opportunity with us!

CE Tech Tips — September 2017

**NOTICE**

Due the danger and complexity of electronics repair, the following shared technical tips are intended for professional reference only. Please refer to manufacturer’s recommendations as Encompass does not guarantee the accuracy, reliability or safety of this information.

Hitachi TV, 50V500A
Reason for Service:  All front LED indicators are flashing in sequence: Power, Temp, Lamp, Power, etc.
Solution: Replaced the lamp. 

Samsung Computer Monitor, 203B
Reason for Service:  No backlights.
Solution: Check all caps on power, inverter board.  It may have also blown a 3A fuse. 

Sony TV, KDL40EX400
Reason for Service:  Set turns on with chime, then shuts down with 6 blink code.
Solution:  Replaced the power supply module.  Part # 1-474-213-11

Sylvania TV, LC320SL1
Reason for Service:  Backlight flashes quickly, then the set shuts down.
Solution:  Replacing Q1970 fixed the set.  Used 2SC3200.

Toshiba TV, 40XV640U
Reason for Service: Has backlight, but no audio/video.
Solution: Replacing the main fixed the set.

Vizio TV, SV470M
Reason for Service:  Dead, no lights on.
Solution: Replacing the power board fixed the set.

Vizio TV, M3D421SR
Reason for Service:  Logo turns to white, but no picture, sound, OSD or control.
Solution: Updating the firmware did not fix the set.  Replaced Q19101 and Q19102, and R931, 0.1ohm, half W resistor.  All on the power board.

Vizio TV, E322VL
Reason for Service:  When you turn set on, the logo goes from amber to white, but keeps alternating amber, white then  set won’t start.
Solution:  Replacing main didn’t seem to fix the set.  This set has built-in Wi-Fi, and requires a couple of minutes to initialize the boot up. Set okay after that.

Oven​ ​Not​ ​Heating?​ ​How​ ​to​ ​Replace​ ​a​ ​Bake Element

**NOTICE**
Due the danger and complexity of electronic equipment repair, the following shared technical tips are intended for professional reference only. Please refer to manufacturer’s recommendations as Encompass does not guarantee the accuracy, reliability or safety of this information. 

If an electric oven is not baking at all, the issue can be diagnosed fairly quickly. If the oven has a sensor, shut the door completely to confirm the oven doesn’t work. If the door is working properly, then the issue may originate inside the unit.

Confirm that you need oven repair by actually seeing that the baking element is not heating. The back element itself can be checked once power has been disconnected from the oven and the element has been properly isolated. It should have roughly 10-50 ohms when checking for resistance. If the resistance is not within that range, the baking element on the bottom of the oven needs to be replaced. Replacing the bottom element is relatively simple; start by disconnecting power to the oven. Then, pull out the racks, remove the doors, and unplug the bake element.

Next, unplug the oven from the bottom. There should be two screws at the back of the oven holding the heating element in place. Remove the screws with a screwdriver, and plug the new element in at the same location of the old one. Make sure it fits properly.

Once the screws are on tightly, push the element into the oven cavity. At this point, all wires should be inside the wall and not visible. Things will get trickier if the bake element is hidden. More disassembly is required, and it’s recommended that you check the service manual for your specific product. Other components can prevent your electric oven from heating to the proper temperature such as the oven sensor probe,  main oven control board, and door alignment issues to name a few.

Special thanks to Fred’s Appliance Academy for this helpful tip!

Centricity and Encompass Further Align to Simplify Parts Procurement for Warranty Repairs

Lawrenceville, Ga., August 8, 2017 – Encompass Supply Chain Solutions, Inc. a leading supplier of distribution, 3PL and 4PL solutions for a diverse range of replacement parts and finished goods, today announced it has further expanded its relationship with Centricity – a top service and protection plan provider – to deliver comprehensive aftersales support for a range of household products.

As part of the two companies’ expanded partnership, Encompass will serve as the primary repair parts supplier to Centricity and will also procure and supply replacement products to consumer extended contract holders when repairs are not economically feasible. Centricity is the newly-formed combination of two business units – Bankers Warranty Group (BWG) and Bonded Builders Warranty Group (BBWG) – held by Bankers Financial Corporation. Centricity merges a leading innovator in service contracts with America’s #1 new home warranty provider to form the most comprehensive risk management solution provider, centered around the customer.

The alliance between Encompass and Centricity builds on the supplier’s previous six-year relationship as a repair parts distributor for BWG’s authorized service center network, which extends to all 50 states, as well as Canada and Puerto Rico. Like Encompass, Centricity is focused on leveraging its core competencies to move into new growth areas and serve as a streamlined, simplified source of products and services to diverse customer channels.

“We appreciate the opportunity to expand our partnership with Centricity as both companies share a commitment to providing strong product support aftermarket,” said John Sessions, Encompass director of Warranty Administration Development. “Encompass looks forward to enhancing our relationship with first-class service to Centricity’s warranty clients, servicers and contract holders.”

Encompass will procure parts and products on Centricity’s behalf in multiple product categories, including Consumer Electronics, Home Appliance, Heating and Cooling, Computer, Mobile Devices and more. The supplier will be held to strict performance standards to manage costs, decrease turn time and positively impact severity.

Centricity is already integrated with Encompass systems for parts support, enabling a smooth transition for additional services. These IT capabilities, along with Centricity’s existing connections to service management platforms, deliver real-time visibility to comprehensive data, which is intended to help Centricity keep customers informed and set expectations at the time a claim is made.

“With Encompass and service management systems working together, Centricity benefits from simplified, easy access to every touchpoint in the claims process from service dispatch to parts ordering to claims approvals,” said Sessions.

One key area of concentration for Encompass will be to help Centricity reduce excessive consumer buyouts.

“Our analysis has consistently shown that more products are being replaced that could have been easily repaired,” said Sessions. “In turn, our warranty company clients are taking a big hit financially, while manufacturer brands are likely being displaced in the home. Encompass hopes to enable more repairs and help reverse this trend.”

Centricity chose to work with Encompass because it has proven to be more of a strategic partner beyond merely a supplier.

“Centricity remains focused on staying connected, remaining committed, and providing convenience and care to ensure we always stay centered around the customer,” said Dawn Morris, president of Centricity. “Based on our long-standing partnership with Encompass, we’re confident in its ability not only in backing our protection plans with exceptional support, but also helping us drive down costs.”

About Centricity

Centricity is a privately-held and wholly-owned subsidiary of Bankers Financial Corporation (BFC). Since 1976, BFC has been the corporate parent to a diverse set of businesses, including three property and casualty insurance companies, one of the nation’s leading surety companies, a professional employer organization for small business, and a financial services company. With assets over $500 million, Bankers Financial Corporation employs over 800 associates throughout the United States and Canada. The Bankers family of companies serve millions of customers throughout North America. 

CE Tech Tips — August 2017

**NOTICE**

Due the danger and complexity of electronics repair, the following shared technical tips are intended for professional reference only. Please refer to manufacturer’s recommendations as Encompass does not guarantee the accuracy, reliability or safety of this information.


Hitachi TV, 51UWX20B
Reason for Service: IC401 failure, protection
Solution: Check solder connection of C417.  Add C480, 0.1uF/50V across C417.  Add C481, 0.1uF/50V to pin 40 and 44 of IC401.

LG Plasma, 50PS30UB
Reason for Service:  Shuts down immediately
Solution:  Replaced Q801 & 802 in the power supply.  STW20NK50Z.  Also F801 was blown, 4A ceramic, slow-blow.

 Magnavox TV, 37MF331D/37
Reason for Service:  Menu pops up intermittently
Solution: Replaced two power switches to fix the set.

Samsung TV, LN3242HX/XAA
Reason for Service:  No backlight.  Might flash very briefly at turn-on.
Solution: Found an open secondary on one of the inverter transformers.  Replacing fixed the set.

Samsung TV, HLS7178WX/XAA
Reason for Service: Set shuts down intermittently when changing input or channel.
Solution: Replaced the DMD board.

Sharp TV, LC32D47U
Reason for Service:  Set comes on with a message to input the password, but end user does not know it.
Solution:  Enter the Factory Mode and Initialize the set to the out of box condition. Hold volume down and input on the set while plugging in.  You should see a K on the screen.  Release the first two buttons and hold down the front volume  and channel down.  Look for initialize on page 2.  When you see the green screen, unplug the set.

Sony TV, KDL-40XBR2
Reason for Service:  Set will power on, but no picture or sound
Solution: Found an open T-Con fuse, 3A SM.

Vizio TV, GV47LFHDTV10A
Reason for Service:  Has backlight but no video
Solution: Found U10 on the main board was defective.

Troubleshooting Whirlpool Ice Maker

**NOTICE**
Due the danger and complexity of electronic equipment repair, the following shared technical tips are intended for professional reference only. Please refer to manufacturer’s recommendations as Encompass does not guarantee the accuracy, reliability or safety of this information. 

If your ice machine suddenly goes silent with none of its usual rumblings, or you notice that the ice levels in your tray are decreasing, something in your ice machine isn’t working right. One of the most common problems is a broken connection point that stops ice from breaking free of the machine and landing in your tray, which signals the machine to keep making new ice.

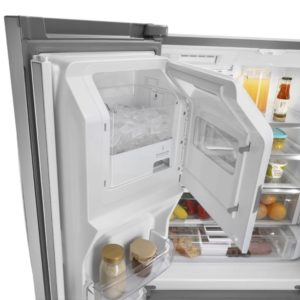
How to Troubleshoot Your Whirlpool Ice Maker for Common Problems and Repairs:

  • Is the connection to the heating element broken? Ice machines work by pouring chilled water through the inlet valve into the machine, and the water starts to freeze in the pan. Depending on your ice machine model, it will either sense when the ice is frozen or operate on a timer. When the ice is considered complete by either mechanism, the floor of the ice machine will start to warm up through a heating element with just enough of the tines of your machine to push cubes free into the waiting tray. The two most common ways the heating element can start to break down and not function as well is if mechanisms within it freeze over or if water gets inside to the electrical components of the motor and heating element. Check over the heating element and any moving parts for bits of ice, which can be carefully chipped away to free those parts of the machine. You can also remove the ice machine from the freezer for a more thorough investigation, and some of the icy obstructions will just melt away. If it doesn’t look like unwanted ice is preventing the heating element from turning on, dismantle and inspect the heating element. Be sure to unplug the refrigerator prior to working on it.  If the metal is corroded and starting to break down, water is probably getting in through one of the connection points. If you see rust, carefully sand it away and solder on a copper contact point to ensure a new, strong connection.
  • Is the inlet valve hose frozen over?Look for a tub above your ice machine that pours water into the machine — it can often be found in the corner of the freezer. If the hose is full of frozen water, it will form an obstruction that prevents water from falling into the ice machine. Because it’s typically made of pliable material, squeeze the hose to break off or loosen any ice without detaching it from the valve.

If you think your Whirlpool ice machine might be experiencing different issues, try addressing the easiest solutions first that require the least amount of dismantling. This makes troubleshooting less of a potential headache, and also lets you determine trends in how your ice machine malfunctions if it frequently stops working. Once you can isolate the core problem, you can decide if a part needs to be replaced; if you would rather replace the whole machine; or if it’s simple enough to regularly maintain. When you have to dismantle the entire machine and inspect it outside of the freezer, make a list of any damage you see so you can systemically diagnose the problem. With ice machines, you often have to wait between each adjustment so the machine can try to complete a test cycle.

If your ice machine needs more than a soldered connection point to kickstart the heating element and it’s not just a frozen inlet hose blocking up your machine, be sure to contact Fred’s Appliance for more advice about how to fix your specific appliance.

Special thanks to Fred’s Appliance Academy for this valuable tip!


Replacing Spray Arms in Whirlpool Dishwasher

**NOTICE**
Due the danger and complexity of electronic equipment repair, the following shared technical tips are intended for professional reference only. Please refer to manufacturer’s recommendations as Encompass does not guarantee the accuracy, reliability or safety of this information. 

Your Whirlpool dishwasher is a time-saver. When it’s working properly, the time you spend in the kitchen is drastically reduced. However, nothing is more frustrating than opening your appliance to find the dishes inside are still dirty. While this may seem like a serious problem, it can actually be a simple fix. Damaged spray arms are a likely culprit. Luckily, replacing the lower or upper spray arm in your appliance is not a difficult or an expensive repair.

Safety First
Before starting any type of dishwasher repair, be sure to unplug your appliance. You should also turn off the water supply. Wearing a pair of work gloves and safety glasses to protect you from injury is highly recommended. If you don’t feel confident in your ability to safely carry out the repairs listed below, please contact a professional.  Also, keep in mind that dishwasher models vary and these steps may not match your dishwasher exactly.

The Spray Arm
Malfunctioning spray arms can affect your dishwasher’s ability to clean. Your appliance’s upper and lower spray arms discharge a strong stream of warm water and detergent, which helps sterilize your dishes. The holes in the spray arms can become blocked due to food particles or other types of debris, such as broken glass or hard water deposits. If a blockage is an issue, simply cleaning the small holes with a paper clip should solve your problem. However, the spray arms in your Whirlpool appliance can also become damaged over time. Cracks or separated seams can form, causing the spray arms to become ineffective. Luckily, replacing a spray arm is an easy fix. For help just follow the directions below.

  • Before you can remove the lower spray arm, pull out the bottom dish rack. Once the dish rack is out of the way, the spray arm will be visible. Next, pull up on the spray arm to detach it from the appliance. After discarding the old spray arm, carefully line up the new arm before pushing down to reattach the part. You should hear a snap when the spray arm is connected properly. Spin the arm around a few times to ensure it is secure and moves freely.
  • To gain access to the upper spray arm, remove the top dish rack. Then, separate the water supply tube from the mounting bracket, which is located on the top of the dishwasher’s tub. Once the tube is free, detach the spray arm assembly. Take the new upper spray arm and snap it into place on the water supply tube. Now reattach the water supply tube to the mounting bracket. Before you insert the dish rack, spin the spray arm to make sure it is stable and can move without any obstructions.

Special thanks to Fred’s Appliance Academy for this valuable tip!