Replacing Freezer Temperature Control Thermostat in Frigidaire Refrigerator
**NOTICE**
Due to the danger and complexity of electronic equipment repair, the following technical tip is intended for professional reference only. Please refer to manufacturer’s recommendations as Encompass does not guarantee the accuracy, reliability or safety of this information.
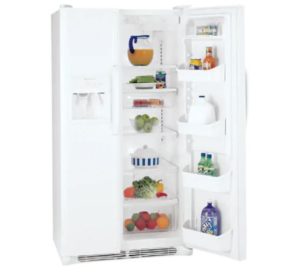
The freezer temperature control thermostat, or cold control thermostat, regulates the temperature inside the freezer compartment. When the thermostat senses the freezer is too warm or too cold, it cycles the compressor on and off. The control thermostat is found in the control housing inside the fresh food compartment of the Frigidaire refrigerator model FRS26R4CW.
 The sensor bulb, which monitors the temperature, stretches from the control thermostat to the
freezer interior. If the freezer runs too cold or too hot, there’s a good chance the
temperature control thermostat has failed and is no longer switching the compressor on and off
at the appropriate time. Unfortunately, a damaged control thermostat cannot be repaired and
will need to be replaced.
Appliance Repair Safety Tips
- Always unplug refrigerator and turn off its water supply before starting work to prevent electrocution injury.
- Keep hands and eyes safe by wearing gloves and safety goggles during repairs.
- Stop what you’re doing and contact an appliance repair specialist if ever a repair job feels unsafe.
Tools Needed
- 1/4″ Nut Driver
- Flat head screwdriver
Steps to Removing Control Housing Assembly from Refrigerator
- Open fresh food compartment door and either lower or remove top shelf. Once
shelf is out of the way, unscrew refrigerator light bulb. - At front of control housing assembly, depress water filter release button. When filter pops out, remove it.
- Using 1/4″ nut driver, unthread screw that secures water line cover to top and rear wall of refrigerator. Then, carefully pull cover off wall and ceiling, and disconnect from back of control housing assembly.
- Now, unthread screws that hold control housing assembly to compartment ceiling and sidewall. There are several screws, so ensure all are removed, including the one behind the damper grill. Once all screws are removed, lower control housing and disconnect wire plug from ceiling.
- Next, pull out the two water lines that run to the back of the control housing. Some water
may leak out of the lines, so have a towel nearby. - Finally, pull out the temperature control sensor bulb from freezer compartment. Move control housing assembly to flat, sturdy work table.
Uninstall Freezer Temperature Control Thermostat
- Start uninstalling temperature control thermostat by removing control knob. To do
so, insert flat head screwdriver behind knob and push off the control thermostat shaft. - Next, remove control thermostat from mounting bracket by using flat head screwdriver to depress locking tab holding component in place. Then, lift thermostat up and disconnect wires running to it.
- Before completely uninstalling control thermostat, free the sensor bulb, which runs along side the damper control. To get to the part, pull top of damper control off control housing. Then, carefully slide sensor bulb out of the plastic installation tube.
Installing New Freezer Temperature Control Thermostat
- Take new control thermostat and straighten out sensor bulb. Then, thread bulb through plastic installation tube attached to side of damper control. Stop sliding sensor bulb forward once tip of the bulb reaches the end of the tube.
- Reinstall damper control by pushing it back onto control housing assembly.
- Insert rest of the sensor bulb into clips running along the inside of the control housing. Then, near the temperature control, bend the sensor bulb to fit the component back into mounting bracket.
- Before pushing control thermostat into bracket, reconnect wires to terminals. Then, use flat head screwdriver to pull back bracket locking tab while pushing down on control thermostat until the component locks in place.
- To complete installation, slide control knob onto thermostat shaft. Test knob out by twisting it around a few times to ensure it rotates freely.
Reinstalling Control Housing Assembly
- Begin installing control housing assembly by threading sensor bulb through opening near back of fresh food compartment. Then, insert control housing plug into refrigerator ceiling. Next, push water lines into back of the control housing assembly.
- Line up screw holes on control housing assembly with screw holes in fresh food compartment ceiling. Then, using 1/4″ nut driver, rethread screw closest to water filter housing. Once that screw is secure, reinstall the rest of the screws. Before finishing, insert screw near water lines and behind damper grill.
- Retrieve waterline cover and reinstall by inserting tabs on front of cover into slots on back of water filter housing. Then, push up on cover to insert locking tabs into the refrigerator ceiling. Finish installing cover by rethreading single screw holding it to rear wall.
- Slide the refrigerator water filter back into its housing. Replace fresh food compartment light bulb, and readjust top shelf.
- Finally, plug in the refrigerator and turn on water supply. Open refrigerator door and set control thermostat to desired temperature. Give some time for the new part to start working and then check to ensure the temperature is now working correctly.
Special thanks to Fred’s Appliance Academy for this helpful tip!


Comment (1)
Thermostat is a very small spare but has an important part to play in the cooling. We run a refrigerator service center and we know the importance of it. Good post which helped us in improving our skills. Thanks a lot.