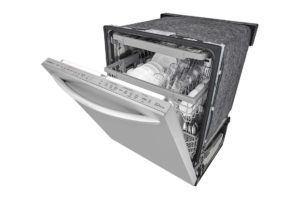
LG Dishwasher Error Codes
**NOTICE**
Due the danger and complexity of electronic equipment repair, the following technical tip is intended for professional reference only. Please refer to manufacturer’s recommendations as Encompass does not guarantee the accuracy, reliability or safety of this information.
The AE error code showing on an LG dishwasher indicates there is a leak inside the unit, which activates the float switch. Sometimes this error code can be easily resolved just by resetting the dishwasher or changing detergents. If the code remains after trying these tactics, there may be an issue with internal components.
This guide applies to all major LG dishwasher models, including:
LDF6810ST
LDF6810ST/01
LDF6810WW
LDF6920BB
LDF6920ST
LDF6920WW
LDF7774ST
LDF7810BB
LDF7810ST
LDF7810WW
LDF7811BB
LDF7811ST
LDS4821BB
LDS4821ST
LDS4821WW
LDS5540ST
LDS5811ST
LDS5811WW
Step 1 – Reset Dishwasher
Start by doing a simple reset of the unit. Sometimes the error code is showing due to a glitch or issue with control board. To reset, turn power off for 10 minutes and then turn back on again. Continue to next step if error code does not go away at this time.
 Step 2 – Look for Water in Drain Pan
The AE error code appears when the float sensor detects too much water in the bottom of the dishwasher. Use a heavy towel to soak up any water found in the drain pan and check to see if the error code has disappeared. If not, continue to next step.
Step 3 – Check Cleaning Detergent
Unless using pods or tablets — which usually include the right detergent amount — double check to ensure use of high-efficiency (HE) detergent. Any other type of detergent will cause too many suds to form in the dishwasher drum, causing a water leak. Try changing to HE detergent, if needed, and check the error code again.
Step 4 – Check Dishwasher Spray Arms
Dishwashers have multiple spray arms that distribute water through the unit. If the arms get blocked or moved out of position, water can leak out through the door.
Follow these instructions to check the spray arms:
- Remove all spray arms and check for any debris that could be blocking the water holes by running water through them. Use piece of wire to remove any blockages.
- Return spray arms to former positions.
- Check to see if AE error code still showing.
Step 5 – Check Door Gasket
A defective door gasket is another potential cause of a water leak. The door gasket or “seal” fits around the dishwasher door to prevent leaks. To check the seal:
- Open dishwasher door.
- Carefully inspect door gasket/seal for any damage and replace if necessary.
- If it looks to be in good condition, clean with hot soapy water to remove any debris that could prevent door from closing properly.
- After replacing or cleaning door gasket, check to see if error code still showing.
Step 6 – Check Water Inlet Valve
The water inlet valve, which opens and closes for water to flow through the dishwasher, can fail and fill up the unit with too much water. Here’s how to check the valve:
- Check to see if water is leaking from valve. If so, it will need to be replaced.
- If no leaks, turn water supply off and then remove hose and check filter and hose for leaks.
- If any components are damaged, replace them.
- Continue to next step if the error code still shows.
Step 7 – Check Float Sensor
The float sensor monitors the dishwasher’s water level. If it fails, too much water may flood the dishwasher and cause leaking. The float sensor can be removed and tested with a multimeter. If faulty, it will need to be replaced.
Follow these instructions to check the float sensor:
- Turn off power and water supply to dishwasher.
- Remove float sensor from dishwasher bottom.
- Test with multimeter. If it has continuity, reattach to dishwasher and move to next step.
- If no continuity, replace it and check the error code again.
Step 8 – Inspect Control Panel
The final option is to evaluate the control panel, which typically will need to be replaced if faulty.
Special thanks to Fred’s Appliance Academy for this helpful tip.


Leave a Reply