
How to Fix Noisy Dryer
**NOTICE**
Due to the danger and complexity of electronic equipment repair, the following technical tip is intended for professional reference only. Please refer to manufacturer’s recommendations as Encompass does not guarantee the accuracy, reliability or safety of this information.
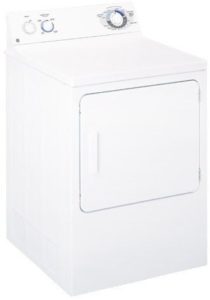
How to Diagnose and Fix a Noisy GE Dryer
Most dryers make noise when operating, but there’s a distinct difference between normal tumbling sounds and and abnormal sounds indicating a malfunction. Oftentimes, the type of sound a dryer emits can help pinpoint the specific failing part. If it’s a rumbling sound, for example, the blower wheel may be worn and loose whereas a grinding or scraping noise can signal a problem with the dryer glides. Luckily, both parts are fairly easy to replace. [Note: this post refers to GE dryer model DBXR463GBWW, but can be used as a general reference for other dryer models and brands.]
Dryer Repair Safety Tips
- Before starting the repair, unplug dryer from wall and turn off gas supply.
- Be sure to wear gloves and eye wear to protect against sharp objects while disassembling and reassembling the dryer.
Blower Wheel
 The dryer blower wheel draws hot air into the appliance drum and then flows out the exhaust vent. As it ages, the blower can wear down, and become loose on its shaft. When this happens, a rumbling or thumping noise may be heard near the bottom of the dryer.
Replacing Dryer Blower Wheel
- First, remove the screws holding dryer console in place. Then, tilt console forward to disengage locking tabs, and lift part out to rest on back of dryer.
- To remove top panel, open dryer door and remove screws securing the front panel to top panel. Next, pull top panel toward you and lift it up and off dryer.
- Now remove screws holding front panel to dryer cabinet. Then, tilt front panel forward until you gain access to door switch harness, which is covered by a small metal shield. Move shield out of the way, and disconnect wires running to door switch. With door switch wires detached, lift front panel up and off dryer cabinet.
- Once front and top panels are removed, take out dryer drum. Remove top screws holding dryer cabinet to dryer bulkhead. Once screws are out, reach underneath drum to remove drive belt from idler pulley. Then, use loose drive belt to help guide dryer drum out of dryer cabinet.
- With access to damaged blower wheel, remove screws securing thermostat that sits on blower wheel. Place thermostat on floor of dryer without disconnecting any wires.
- Next, remove screws holding blower wheel housing to front of dryer bulkhead. Move to back of drive motor and remove screws securing it to dryer floor. Once screws are out, carefully pull drive motor back to remove the blower wheel from its housing.
- Detach blower wheel from drive motor by unthreading screw that secures blower wheel clamp to motor shaft. After clamp is disengaged, slide blower wheel of motor shaft and remove back half of blower wheel clamp.
- To start installing new blower wheel, slide back half of blower wheel clamp onto drive motor shaft. Next, slip blower wheel onto shaft and install front clamp to secure part.
- Now it’s time to reassemble the dryer. Start by placing blower wheel back into its housing, and then reinstall drive motor to floor of dryer. Once motor is secure, rethread screws that attach blower wheel housing to dryer bulkhead. Finally, place thermostat back on side of blower wheel, and rethread screw that holds part in place.
- Retrieve dryer drum, and carefully guide it back into dryer cabinet. Be sure to line up shaft on back of drum with cut out in back of dryer cabinet.
- Once drum is in place, rethread drive belt around idler pulley and motor shaft pulley. Then, reattach screws that secure dryer cabinet to dryer bulkhead.
- Line up bottom of the front panel with bottom of dryer cabinet, and then reconnect wire harness that runs to dryer door switch. Once door switch and its wires are rejoined, finish replacing dryer front panel by lifting it up and securing it with screws taken out earlier.
- Finish closing up dryer cabinet by reattaching top panel. To keep panel in place, open dryer door and rethread screws that secure it to cabinet.
- Flip over dryer console, and line up tabs on bottom of console with slots on top panel. Then, push console back until it clicks into place. Finally, secure console by rethreading screws taken out at the beginning of the repair.
Replacing Outer Drum Slides
The drum slides in the dryer supply the drum with support by providing a smooth surface for it to rotate on. Due to age and years of use, the slides in a dryer can wear down; one of the first symptoms of failing slides is either a grinding or scraping noise. Following are instructions on replacing dryer slides:
- Remove screws that secure dryer console to dryer, and then lift console up to free bottom tabs from top panel. Flip console over back of dryer and allow it to safely rest there.
- Open dryer drum and remove screws holding top panel to front panel. Then, lift panel off dryer cabinet.
- Unthread screws securing front panel to dryer cabinet. Once screws are out, lift panel up and off front of dryer cabinet. There is no need to disconnect door switch wire harness; instead, lean front panel against something sturdy so it doesn’t fall.
- Outer drum slides can be found on back of front panel around drum slide bearing. Remove damaged slides by pulling them out of slots.
- Discard old drum slides and install new ones by simply inserting into existing slots.
- Reattach front panel to dryer cabinet, securing it with screws previously removed. Reposition top panel and open dryer door to replace screws holding panel in place. Finally, flip over dryer console and reinstall it.
Special thanks to Fred’s Appliance Academy for this helpful tip!

