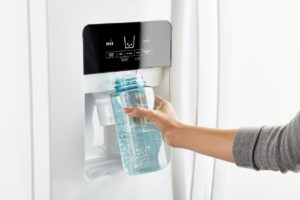
Replacing Ice Maker Bucket in Whirlpool Refrigerators
**NOTICE**
Due to the danger and complexity of electronic equipment repair, the following technical tip is intended for professional reference only. Please refer to manufacturer’s recommendations as Encompass does not guarantee the accuracy, reliability or safety of this information.
If the ice maker bucket of a Whirlpool, Kenmore, Kitchenaid or Maytag freezer breaks, it can be replaced without having to buy a new refrigerator or ice maker. Fortunately, the refrigerator panel doesn’t have to be opened to perform this fix. If you’re handy with a pair of needle-nose pliers, you can replace the bucket of a Whirlpool ice maker.
 Supplies
In addition to a replacement ice maker bucket for the correct product model number, needle-nose pliers and a screwdriver are needed for this job. The type of screw cap differs by model, so a combo wrench or socket screwdriver kit is recommended.
● Replacement Ice Maker Bucket
● Needle-nose Pliers
● Towel
● Screwdriver or Combo Wrench
● Flat Work Surface
Remove the Ice Bucket
- Pull Out Entire Bucket Assembly
Removing the ice bucket is easier than it looks. Simply grasp it firmly and pull the entire
assembly out and away from the freezer back panel, detaching it from mechanical coupler. - Place On Flat Work Surface
Lay towel over work surface, and position ice bucket upside down. The opening should be facing table showing a thin metal post secured along underside of ice bucket. - Detach Actuator Arm
The actuator arm is the metal bar across the now top of the ice bucket assembly. It attaches bucket to rest of assembly and will need to be detached from bucket before continuing. - Release Arm Spring
Use needle-nose pliers to grasp small spring wire in groove of plastic arm stand. Pull wire away to release spring. Twist spring to release other side. - Remove Retainer Bracket and Screws
Unscrew screws holding bracket onto arm stand. Pull entire retainer bracket away and set aside with the screws. This will release actuator arm. - Remove Screws Inside Ice Bucket
Flip ice bucket up on heavy end, with auger tip pointing up. You should be able to see two screws inside bucket that are securing it to the auger assembly. Remove these screws and the ice bucket will loosen. - Pull Out Old Ice Bucket
Removing the ice bucket is tricky. Carefully guide it out around the metal auger until it can be
pulled away free. Discard ice bucket once it’s loose. - Install New Ice Bucket
Unpack new ice bucket, ensuring removal of all small pieces of packaging that may be fitted around small, thin or protruding pieces. - Guide Bucket Around Auger
Installing new bucket requires same maneuver in reverse. Carefully guide new ice maker bucket in and around auger spiral until it can set into housing. - Screw into Assembly Housing
Settle new ice bucket into assembly housing, and retrieve screws just removed. Tighten screws firmly to ensure bucket does not come loose later when it’s full of ice. - Align Actuator Arm with Mounting Stand
Move actuator arm back into place to rest on arm stand of new ice bucket. The spring should be on outer side of stand as it was before. - Set Retainer Bracket over Actuator Arm
Retrieve actuator arm retainer and place over arm on new stand. Reinstall screws and tighten securely. - Wind Actuator Spring into Place
To get spring back into place, turn actuator spring counterclockwise. Carefully set securing wires into place. Use needle-nose pliers if needed. - Return Ice Bucket
The final step is placing entire ice bucket assembly back into the refrigerator. Once this is
done, the ice maker should return to normal function. - Slide Ice Bucket Assembly into Place
Once new ice bucket is fully secured to assembly, put the entire assembly back into the fridge. Fit assembly back into its slot, but don’t press in yet. - Rotate Auger to Seat Coupler
If assembly doesn’t fit perfectly at first, manually turn auger until the mechanisms fit together. Because this is an entirely mechanical piece, line up gears for assembly to fit into place.
Special thanks to Fred’s Appliance Academy for this helpful tip!


Leave a Reply