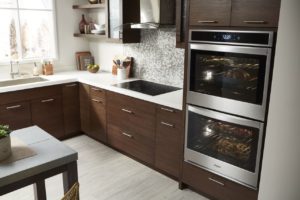
How to Replace Main Control Board in Whirlpool Double Oven
**NOTICE**
Due to the danger and complexity of electronic equipment repair, the following technical tip is intended for professional reference only. Please refer to manufacturer’s recommendations as Encompass does not guarantee the accuracy, reliability or safety of this information.
If both the bottom and top units of a double oven are not working, this should provide a clue as to which component needs to be replaced.
Tools Needed
- Flathead Screwdriver
- Needle Nose Pliers
- Philips Head Screwdriver
Safety First
Unplug the oven from its power supply before beginning any work.
Symptoms
Check for the following to help diagnose the issue:
- The bake and broil heating elements don’t work but test positive for continuity, proving there is a continuous electrical path.
- The power source is delivering 240 volts of alternating current.
- The bake and broil heating element connection wires show no signs of burn marks or damage.
- Testing for continuity, the thermal fuse shows a continuous electrical path is present.
- Check schematic and confirm ohms for the thermostat and heat sensor and test both for the correct amount.
 If the power supply, heating elements, thermostat, fuse and heat sensor are operating correctly, it’s a good possibility that the main control board is malfunctioning and will need to be replaced. Since the thermal fuse is functioning properly, this symptom should convey that the control board is getting power but is incapable of operating the oven.
To repair, first remove the door to the lower oven:
- Open lower oven door and find the hinges.
- Release each hinge by pulling back on the hinge locks.
- Position the door until it is about 45 degrees to the floor; lift it off its hinges; and set aside. (Be aware that oven doors are heavy!)
Remove the Cosmetic Molding
- Remove the two bottom screws that hold molding in place.
- Open the top door, locate and remove two more screws that hold the molding.
- Remove the two screws that hold the bottom decorative molding in position.
- Carefully remove all molding and set aside.
Pro Tip: Keep track of screws by placing in a small jar.
Access the Main Control Board
- Remove the four mounting screws located on the oven frame.
- Pull the oven out slightly, about 3-4 inches, to gain access to the two control board mounting screws: two on the right side and two on the left.
- Open the top oven door and grab the control board on each side. Pull it toward you and then pull up. You now have access to the control board with its menagerie of wire harnesses you will need to remove. However, there are few more steps prior to removing these wires.
Remove the Old Control Board
- Carefully disconnect the ribbon cable that connects the touchpad to the main control board. This is the ribbon that communicates oven control actions to the other components. Be careful not to damage any pins as you remove it. Squeeze inward on the outer edges of the cable and pull the connection away from the board.
- Remove four Philips screws that hold the board in position on the touchpad bracket. Don’t forget to disconnect the grounding wire.
- Place the touchpad on a flat workable surface.
Install the New Control Board
- Line up the new control board with the screw holes on the touchpad.
- Thread the ribbon cable through a slot located on the control board and gently push the cable into its accompanying tabs.
- Reinstall the four Philips screws that hold the control board to the touchpad frame.
- Although each wire harness is keyed to fit only one connection on the main board, it is wise to snap a picture of the old control board as there are at least two spade connectors that look alike, and you want to make sure they are correctly
connected. - Remove the wire harnesses from the old main control board.
- When disconnecting wire harnesses from any component, grip the connector gently and pull. Never remove the connectors by pulling on the wires as this may cause a wire to come loose in the connection.
- The black connectors indicate a tighter fit, and you may need a set of pliers to provide additional leverage to help release the connection.
- After removing all connections, remove the sub control board located on the left end of the old control board. The new control board does not come equipped with one.
- Find the clip that holds the sub control board in place. Depress the clip and pull the board up to remove.
- Now, install the sub-board on the new control board. Depress the clip, slide the board into place and release the clip to secure. That’s all there is to it.
Install Wire Harnesses to New Control Board
- One technique used by technicians is to reconnect the ground wire first to help prevent accidentally dropping the new control board.
- Reconnect the spade connections first. Here is where the picture taken previously should help. You need to ensure that these two connections return to the correct tabs.
- Continue by connecting all other wire harnesses that are keyed to connect in one connection only.
- Another technique is to simply work in reverse of the way you removed the connections.
- Also, it may be possible to use the top oven cover to assist you in balancing the control board.
Replace the New Control Panel
- The control panel has notched openings that slide over tabs located on the front of the oven.
- Once you feel the panel is notched in. push it down and forward slightly and feel it click into place.
- Secure in place with the Philips screws: there is no need to over tighten. Over tightening will sometimes strip or break softer screws.
Final Steps
- Push the oven back in place and secure with four Philips mounting screws. You should use a drill gun on these screws for additional torque. But still, do not over tighten.
- Reinstall the bottom decorative molding.
- Reinstall the frame molding.
- Reinstall the lower oven door. Place the door hinges in the hinge opening. Lift up and open to a 90-degree position. Slide the hinge covers over the hinges.
- Close the door.
- Reconnect the power.
- Test the touchpad functions.
Special thanks to Fred’s Appliance Academy for this helpful tip!


Comments (2)
Do you have a video link? How to?
Hi Wendell, this tip came from Fred’s Appliance Academy. I would reach out to them directly for help: